How to create an allowance in Spendcatcher
Step 1: Open a new allowance
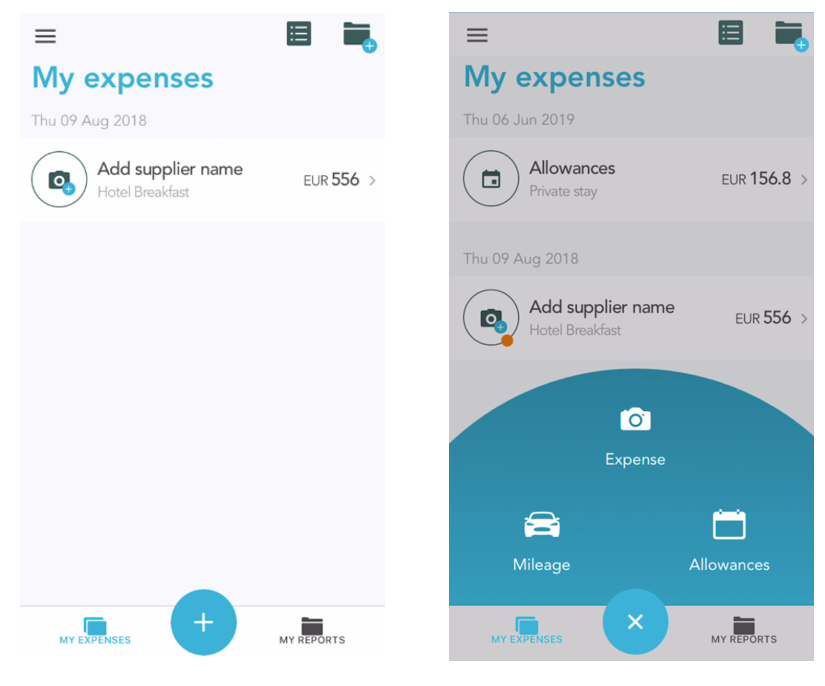
Open your SpendCatcher app.
Tap on the “+” to open the circular menu.
Tap on “Allowances” located on the right side of the circular menu to start a new Allowance.
Step 2: General details
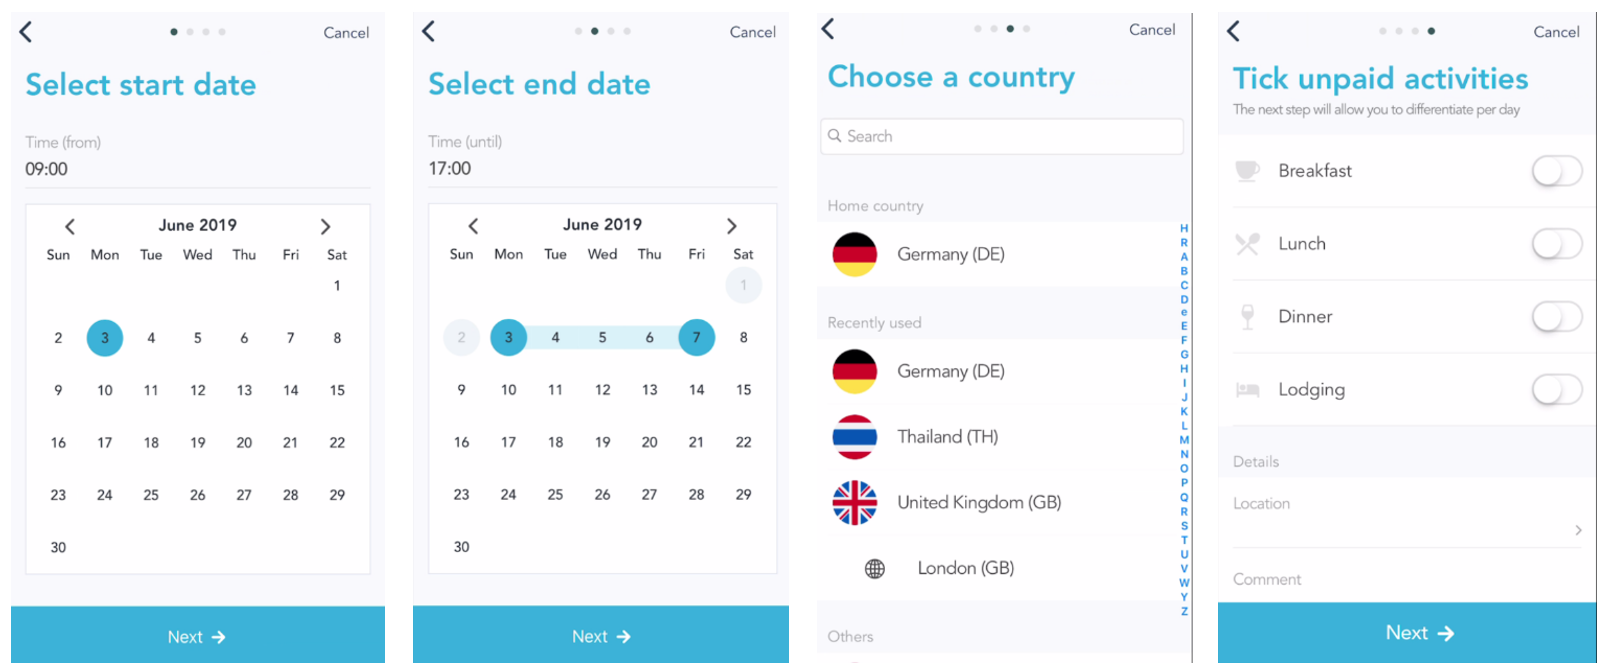
4. Select the Start Time and Date on the Hour and Date picker and then select “Next”.
5. Select the Ending Time and Date. You will see the Date range appear on the Calendar. After this, select “Next” again.
6. Choose the country. The recently used countries appears first. You can scroll the list or directly use the search bar.
7. Now you can tick the categories for your Allowance. You can also add a Location name and a comment. When completed, select “Next”. After this last step, your allowance will be calculated.
Step 3: Calculate and save the allowance
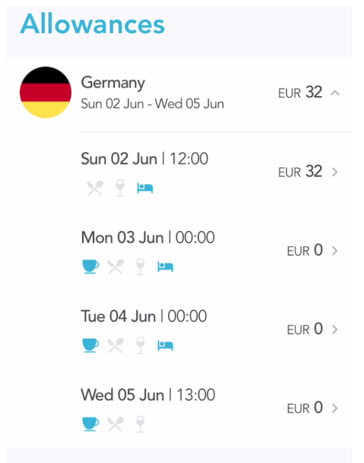
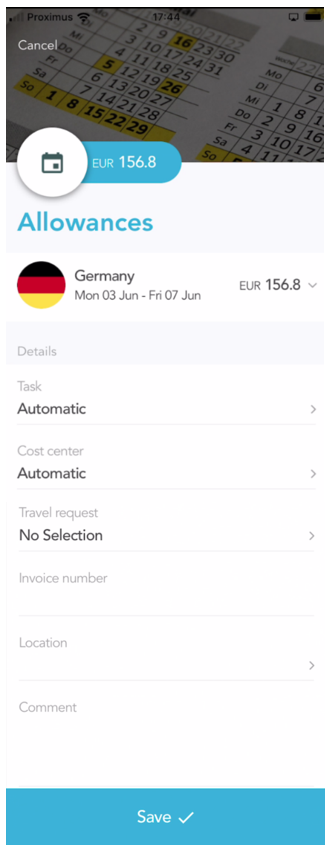
Now, you can view automatically a quick summary of your allowance with the location and period as well as the total calculation of the allowance. Tap on the summary to open the details.
Below the quick summary, you can add details such as Project, Cost center, Task, …
Tap on “Save” to save and submit your allowance.