How to create an expense without OCR in SpendCatcher
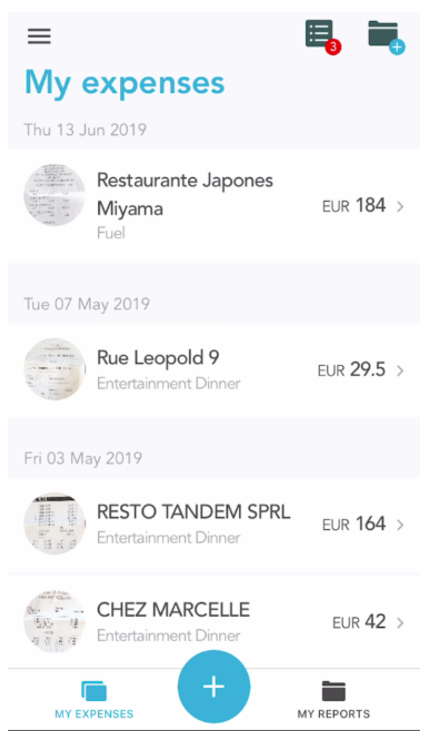
Step 1: Open your SpendCatcher app
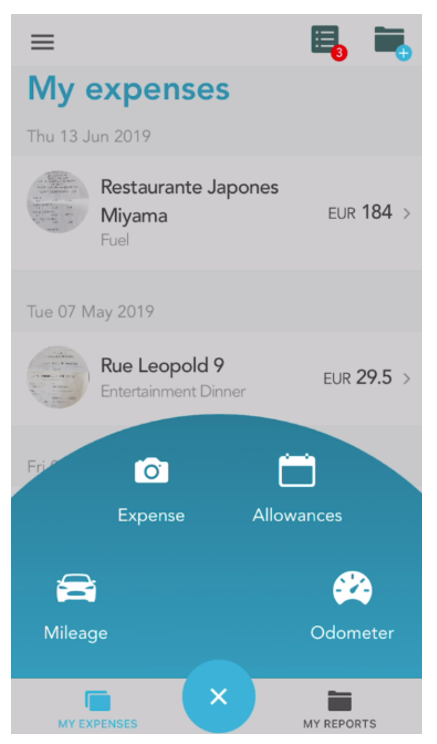
Tap on the “+” to open the circular menu and choose a new item.
Tap on “Expense” to start a new Expense.


Step 2: Skip the scan of the receipt
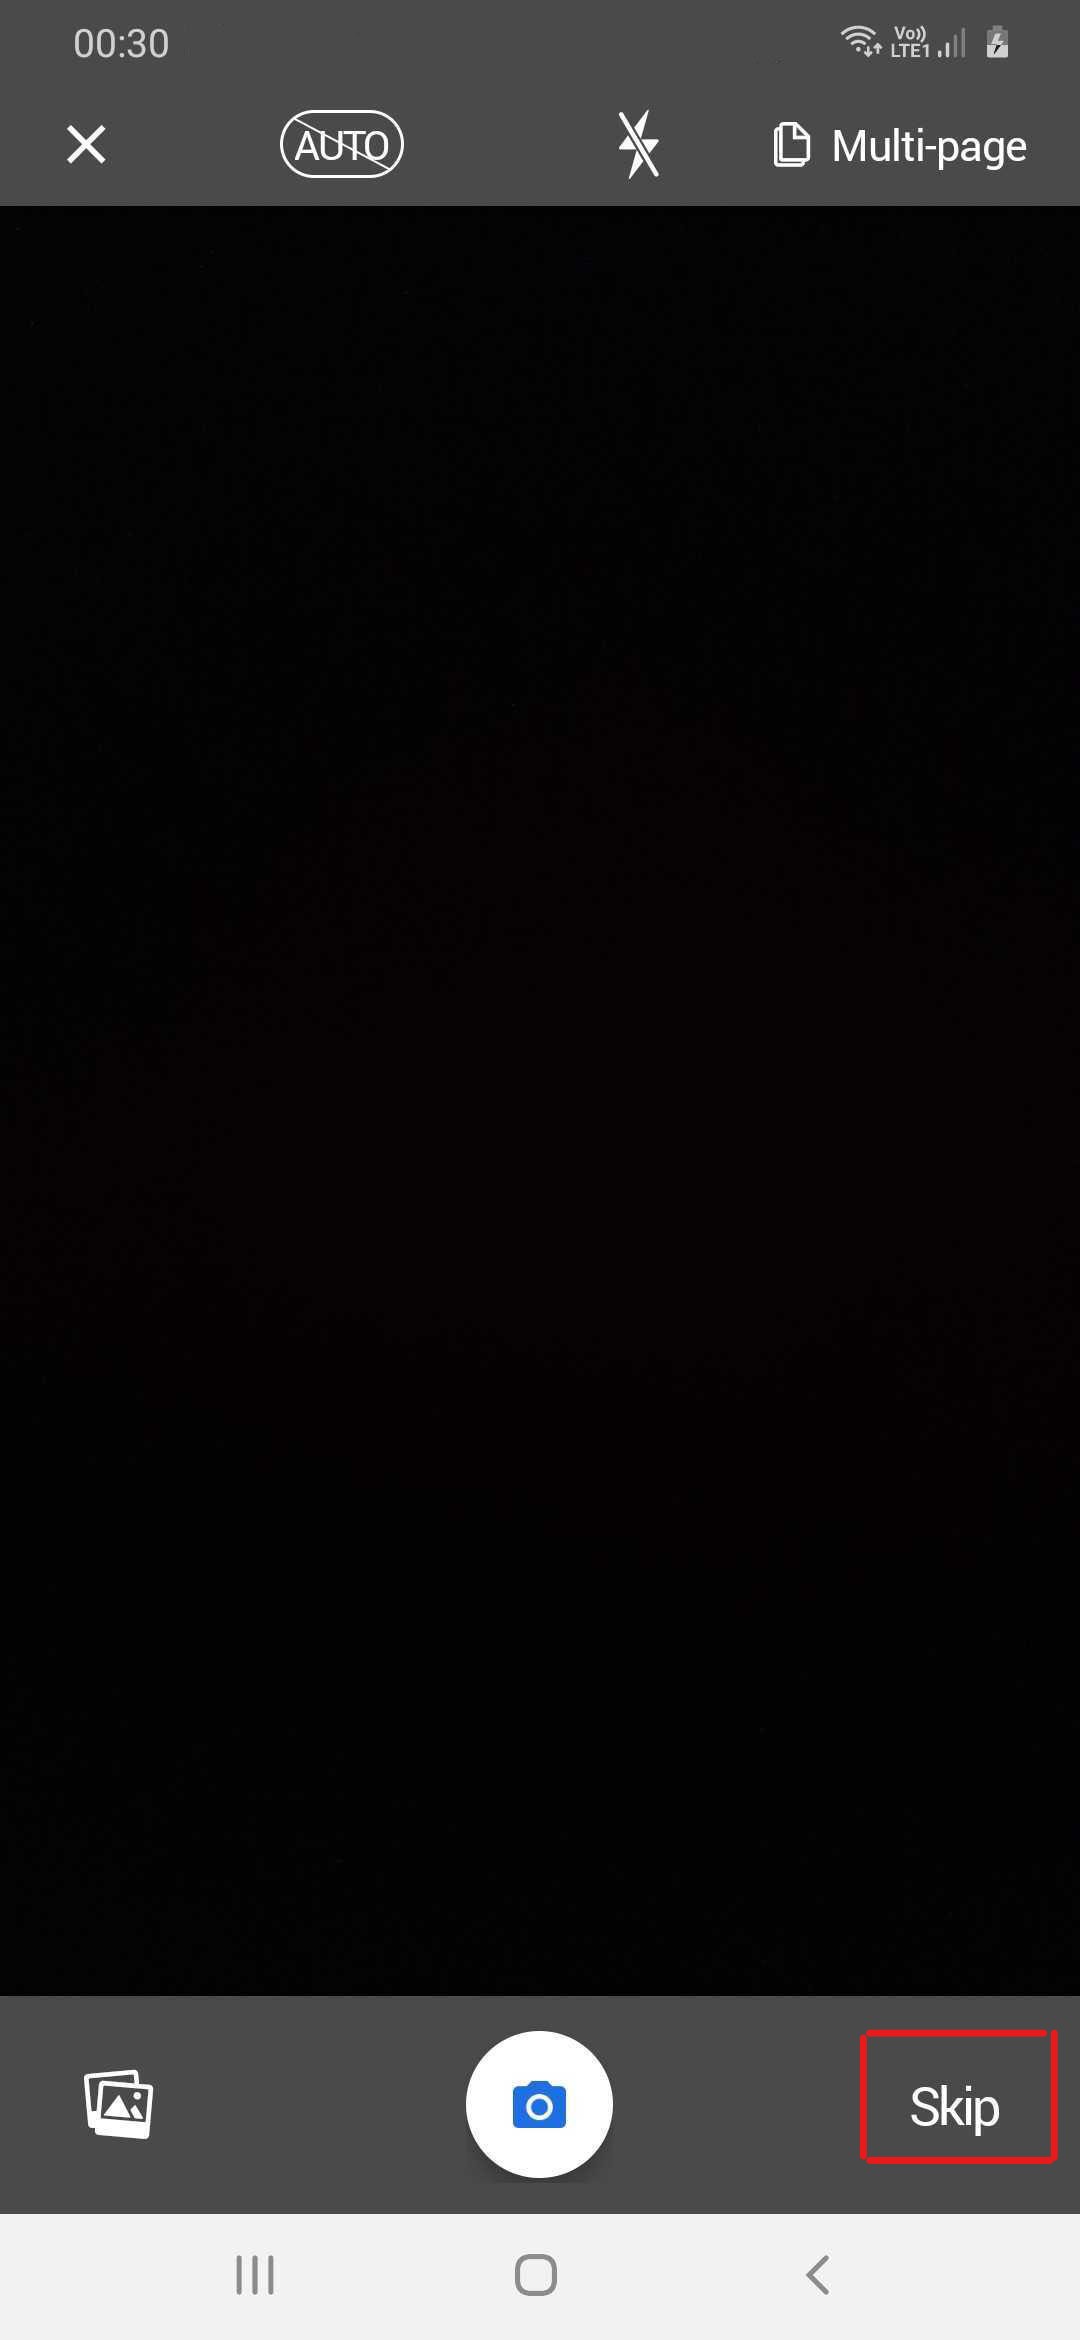
Then, you can select the Skip button to head to the manual creation of your expense. You will be able to add a receipt at the next step.

4. Select additional features to scan your receipt in the table below:
Button | Description |
|---|---|
 | Activate the auto trigger and let the app detect the receipt for you. Location: Top middle-left of screen. |
 | Add pages if your receipt contains several ones. Location: Top right of screen. |
 | Activate the flash if you need more light. Location: Top middle of screen. |
 | Cancel the New Expense. Location: Top left of screen. |
 | Upload a receipt from your library. Location: Bottom left of screen. |
 | Skip and head to the manual flow Location: Bottom right of screen. |
  | Press the circle to capture the receipt. Location: Bottom middle of screen.
|
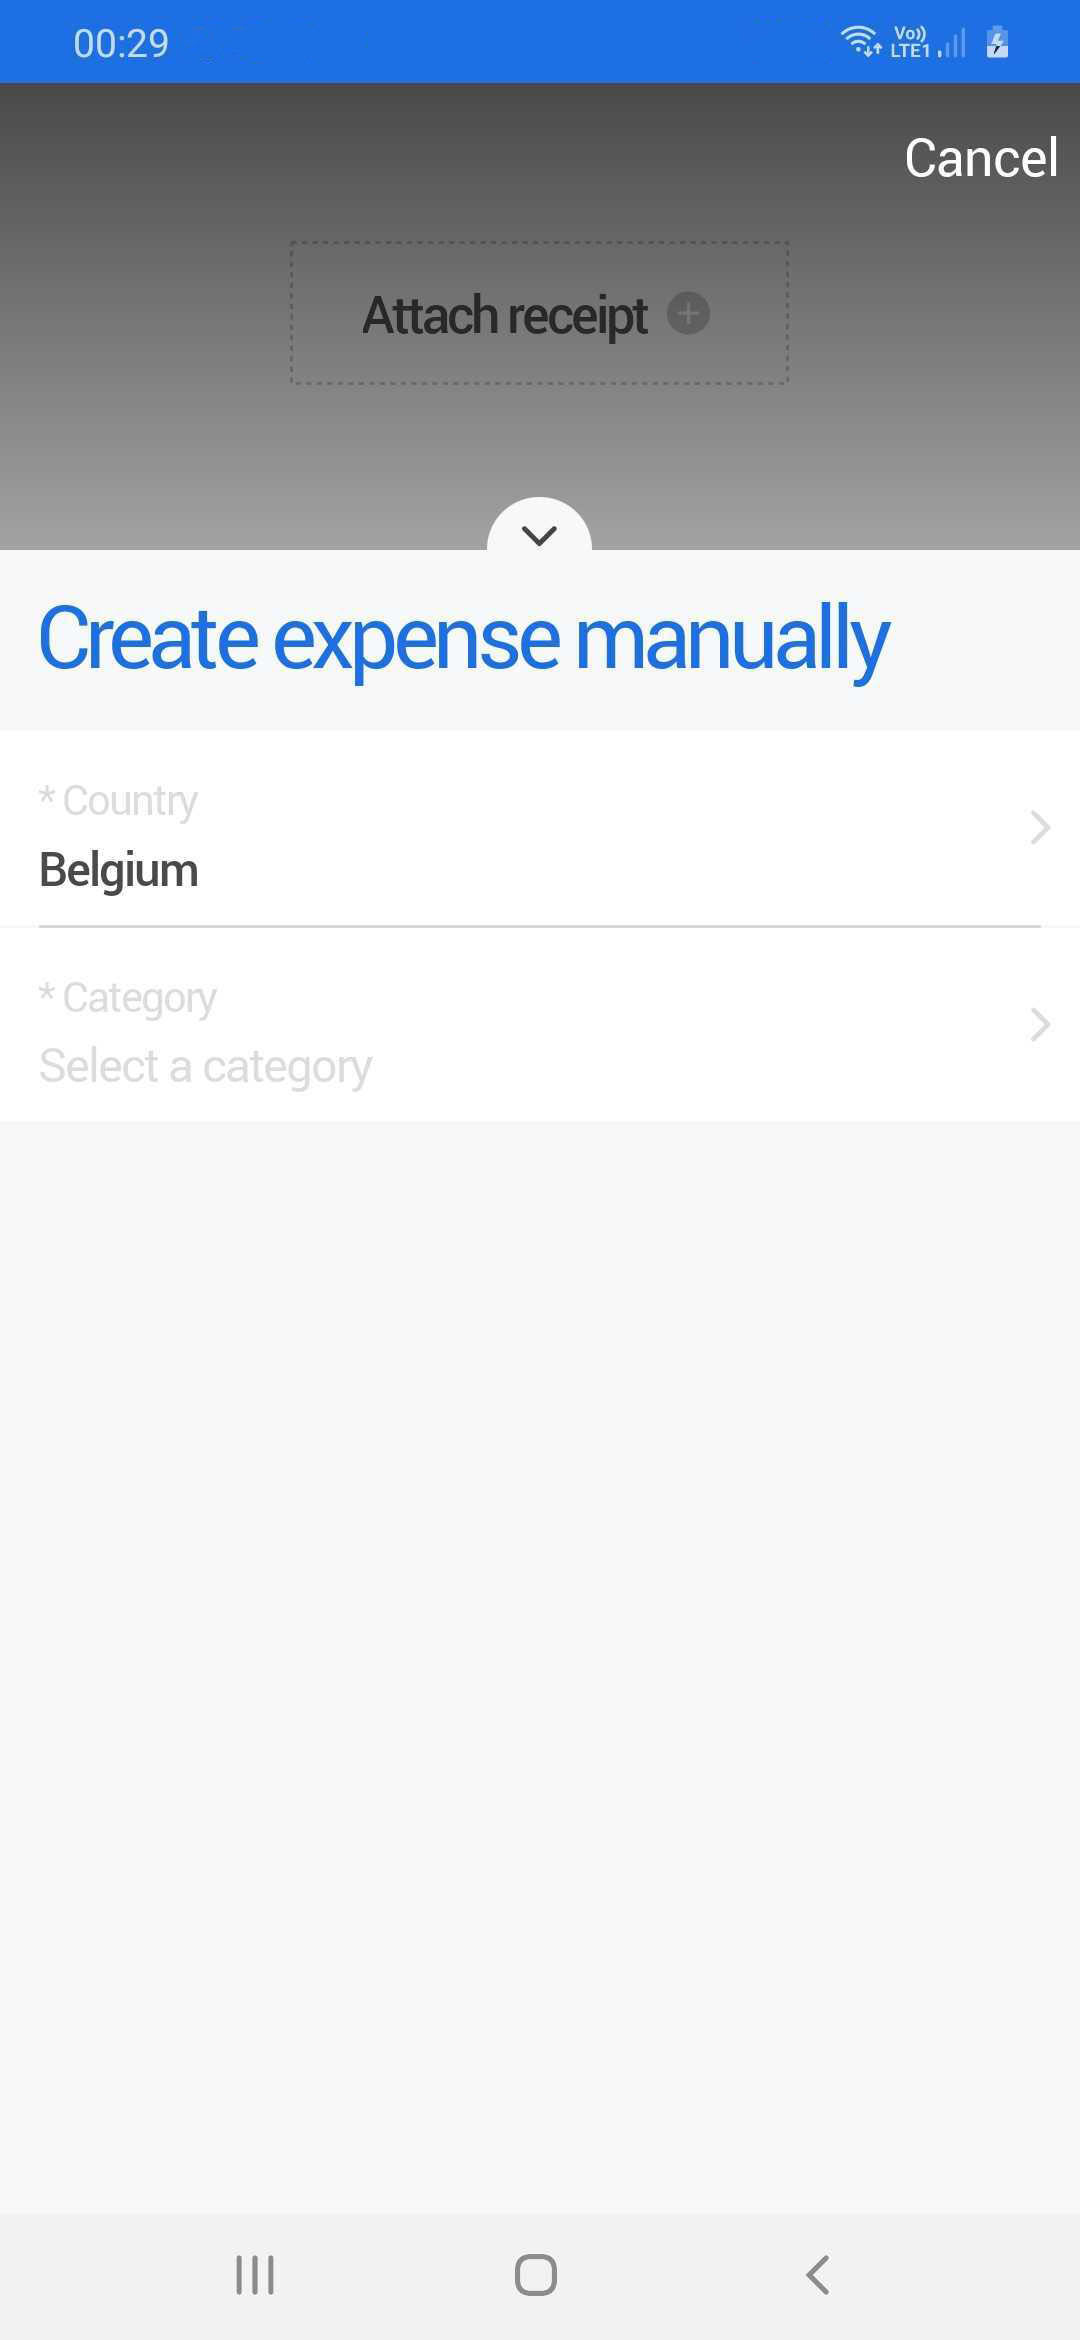
The country selection is automatic if you allow the app to access your position. You are free to select the country of your choice manually.
Select a category for your expense.
Once you selected the category, all the mandatory fields required for the creation of the expense will appear on the screen.
.png?inst-v=8da7d7f1-04a0-473a-afd8-6e1c15aa820f)
You can attach a receipt at this stage by selecting the “Add receipt” option on top of the screen. It will redirect you to the camera view where you can take a picture of a receipt or add an attachment from your library.

Step 3: Save your expense
When all the mandatory fields have been completed a Save button will appear at the bottom of the screen.
After saving, the expense will be available in your transaction list. You can select your expense in order to open and edit its details.
f.png?inst-v=8da7d7f1-04a0-473a-afd8-6e1c15aa820f)
