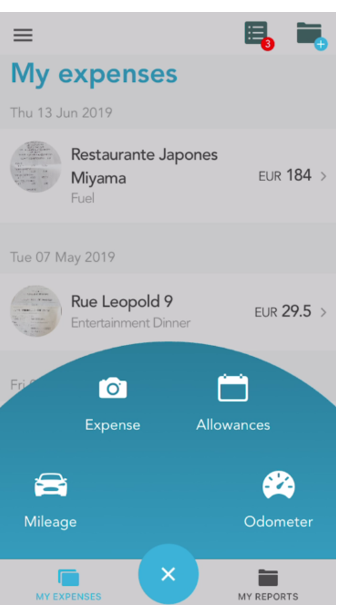
Step 1: Open Odometer
-
Tap on the “+” to open the circular menu.
-
Tap on “Odometer” to start a new odometer entry.
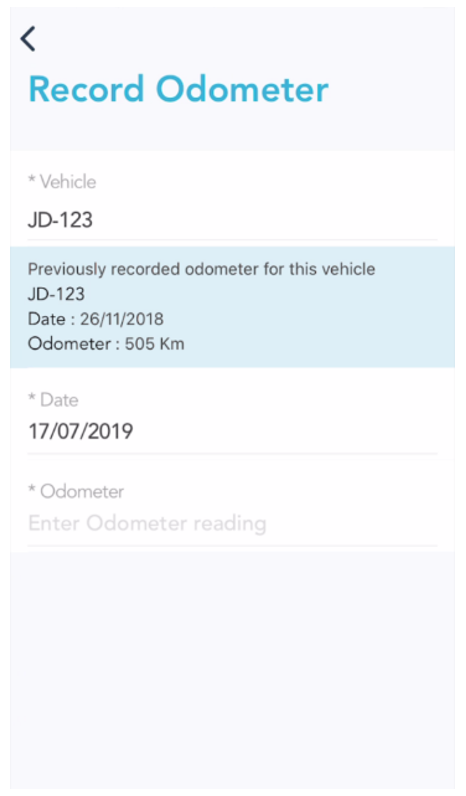
Step 2: Record your Odometer
If you have multiple vehicles linked to your account, you can select the one you want to record an odometer for.
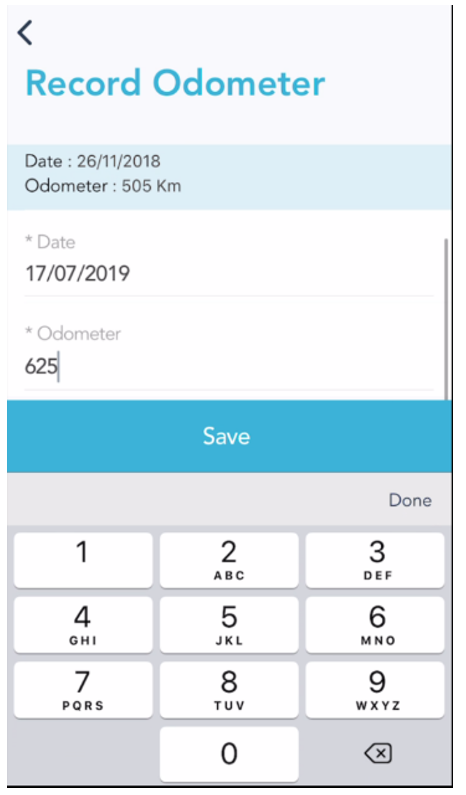
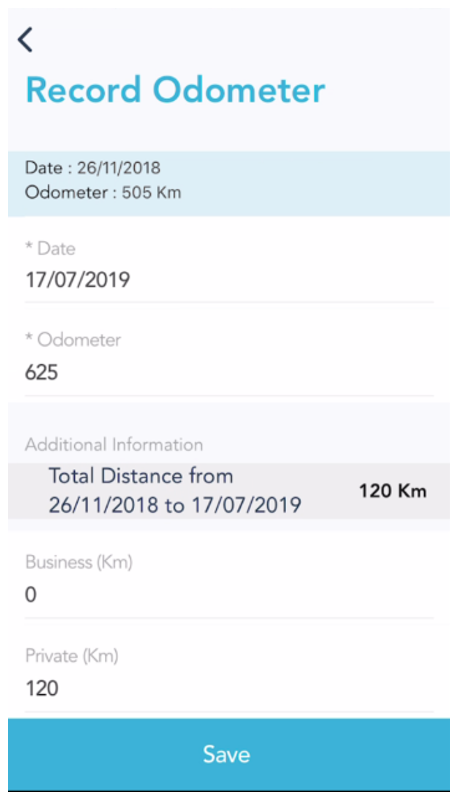
The previous odometer recorded for the vehicle is displayed.
By default, the day date is displayed but you can choose any date from the past.
You can then set the odometer value for your vehicle on the chosen date. Only values higher than the previously recorded odometer will be accepted. If you try to set any value that is lower, the last recorded odometer will be displayed.
Split the distance you have travelled between Business (Km) and Private (Km). If you add distance to Business, the value will be reduced in Private in order to always have the same total distance.
Step 3: Saving and editing your odometer
Once you have saved your odometer, a pop-up will appear to let you know your odometer has been saved.
Your Odometer appears on the main screen (My Expense) as a Mileage. You can select it to view details or edit it.