
A transaction can be split / itemized into different items (like hotel expenses, car expenses). Here are a few details to help you understand the process.
-
You can split certain expenses from:
-
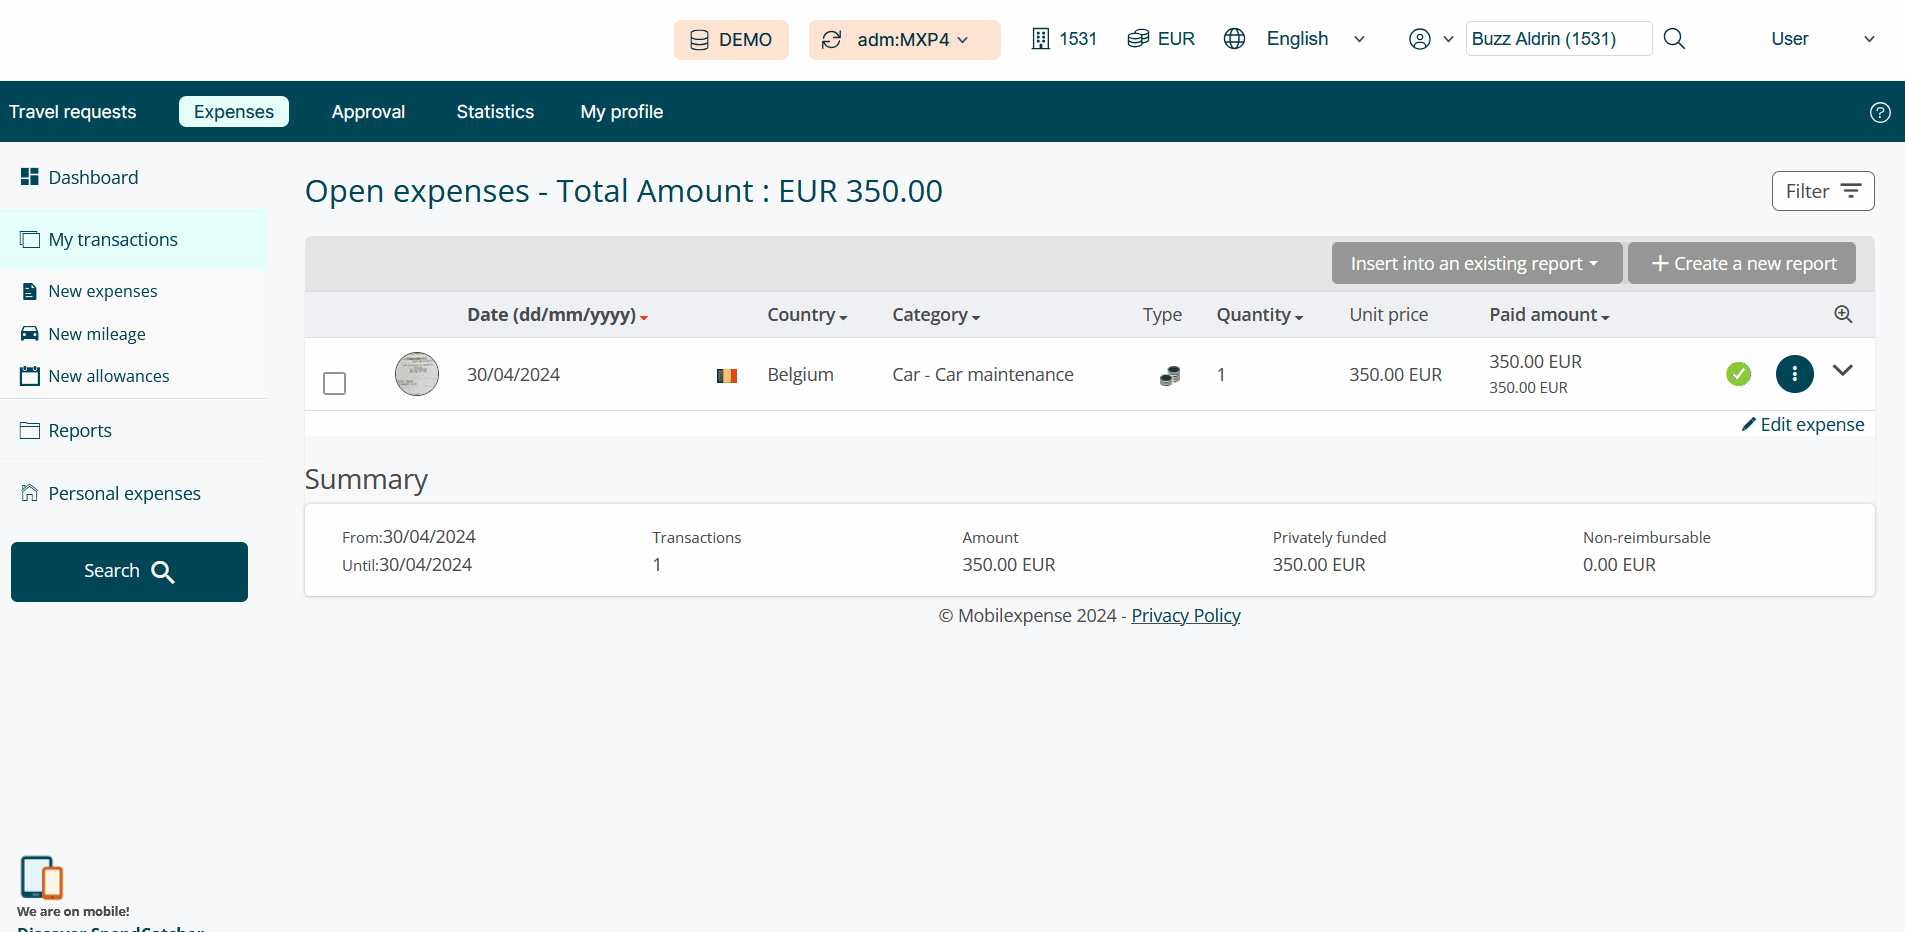
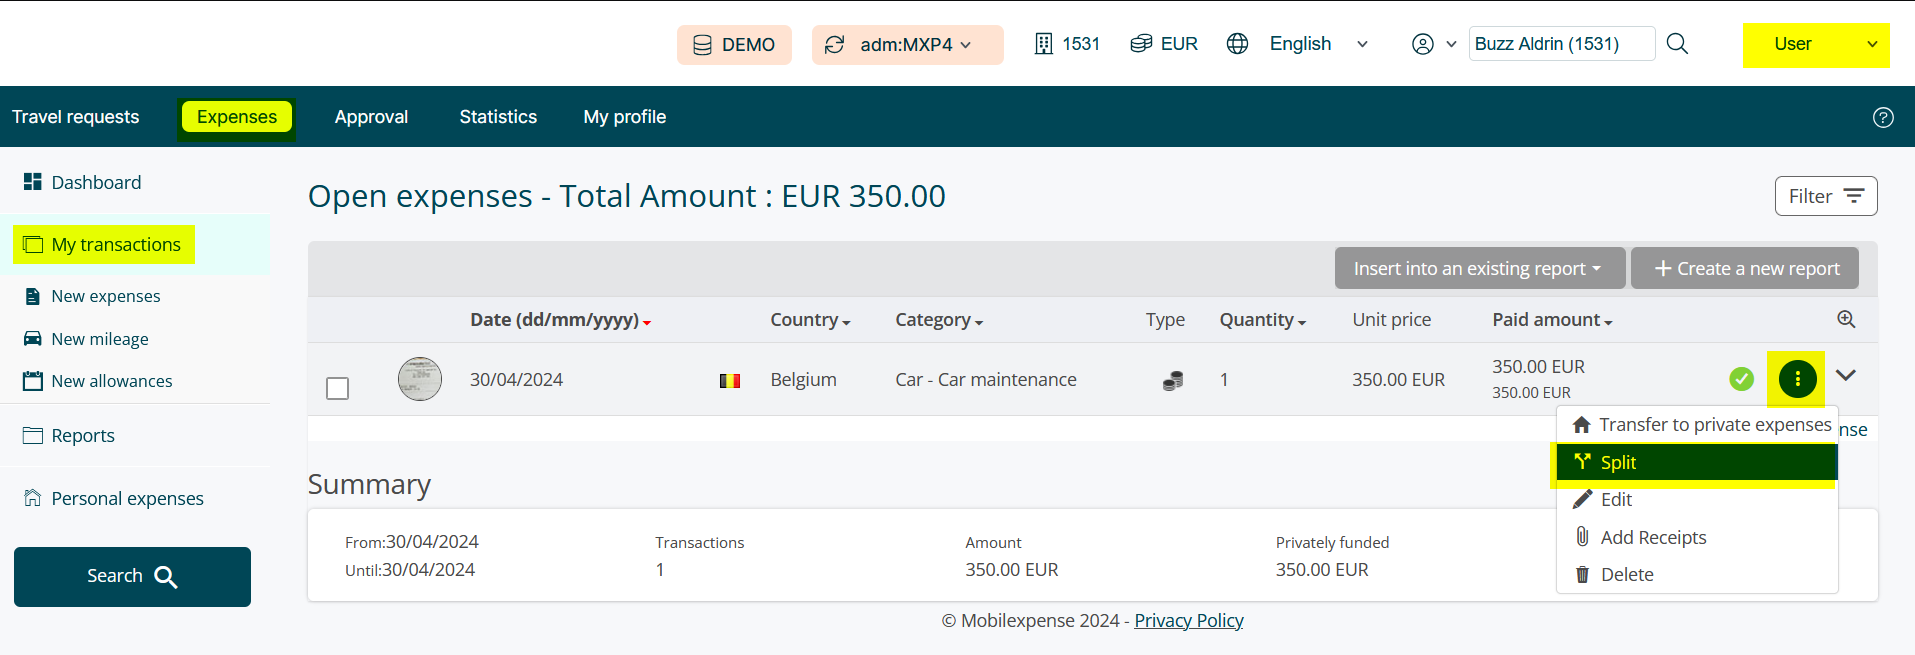
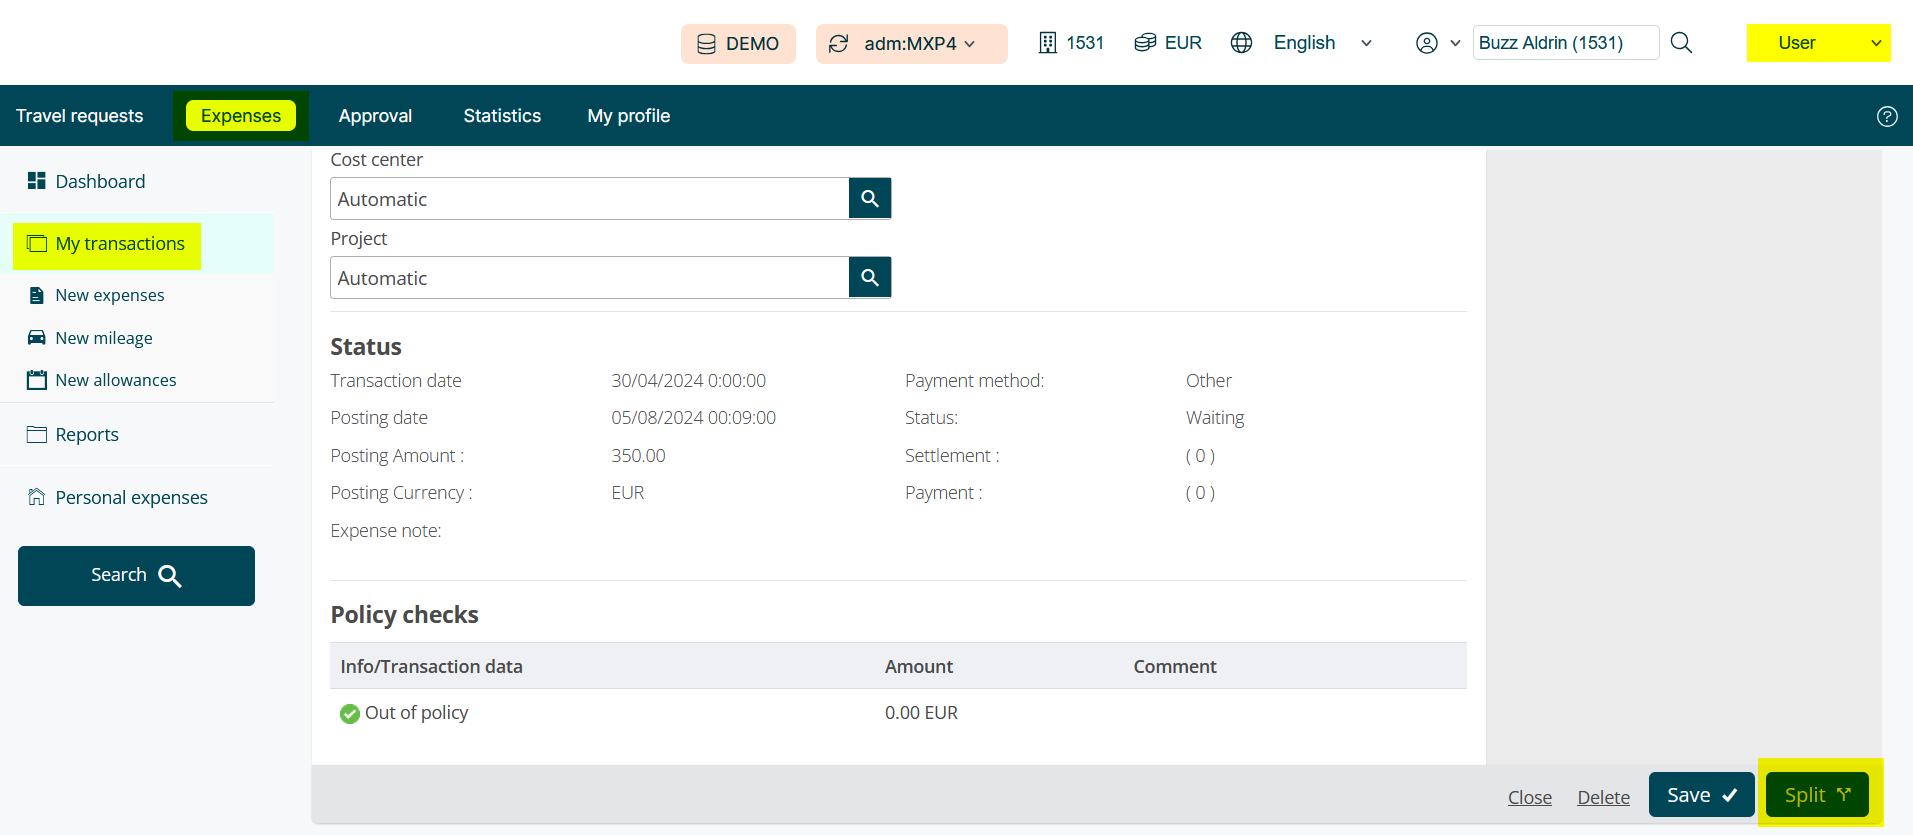
The transaction list - Hover over the blue button at the end of a transaction line to access the split option for itemizable transactions. Alternatively, you can split a transaction by clicking the category in the expense line and then selecting “Split” in the popup.
-
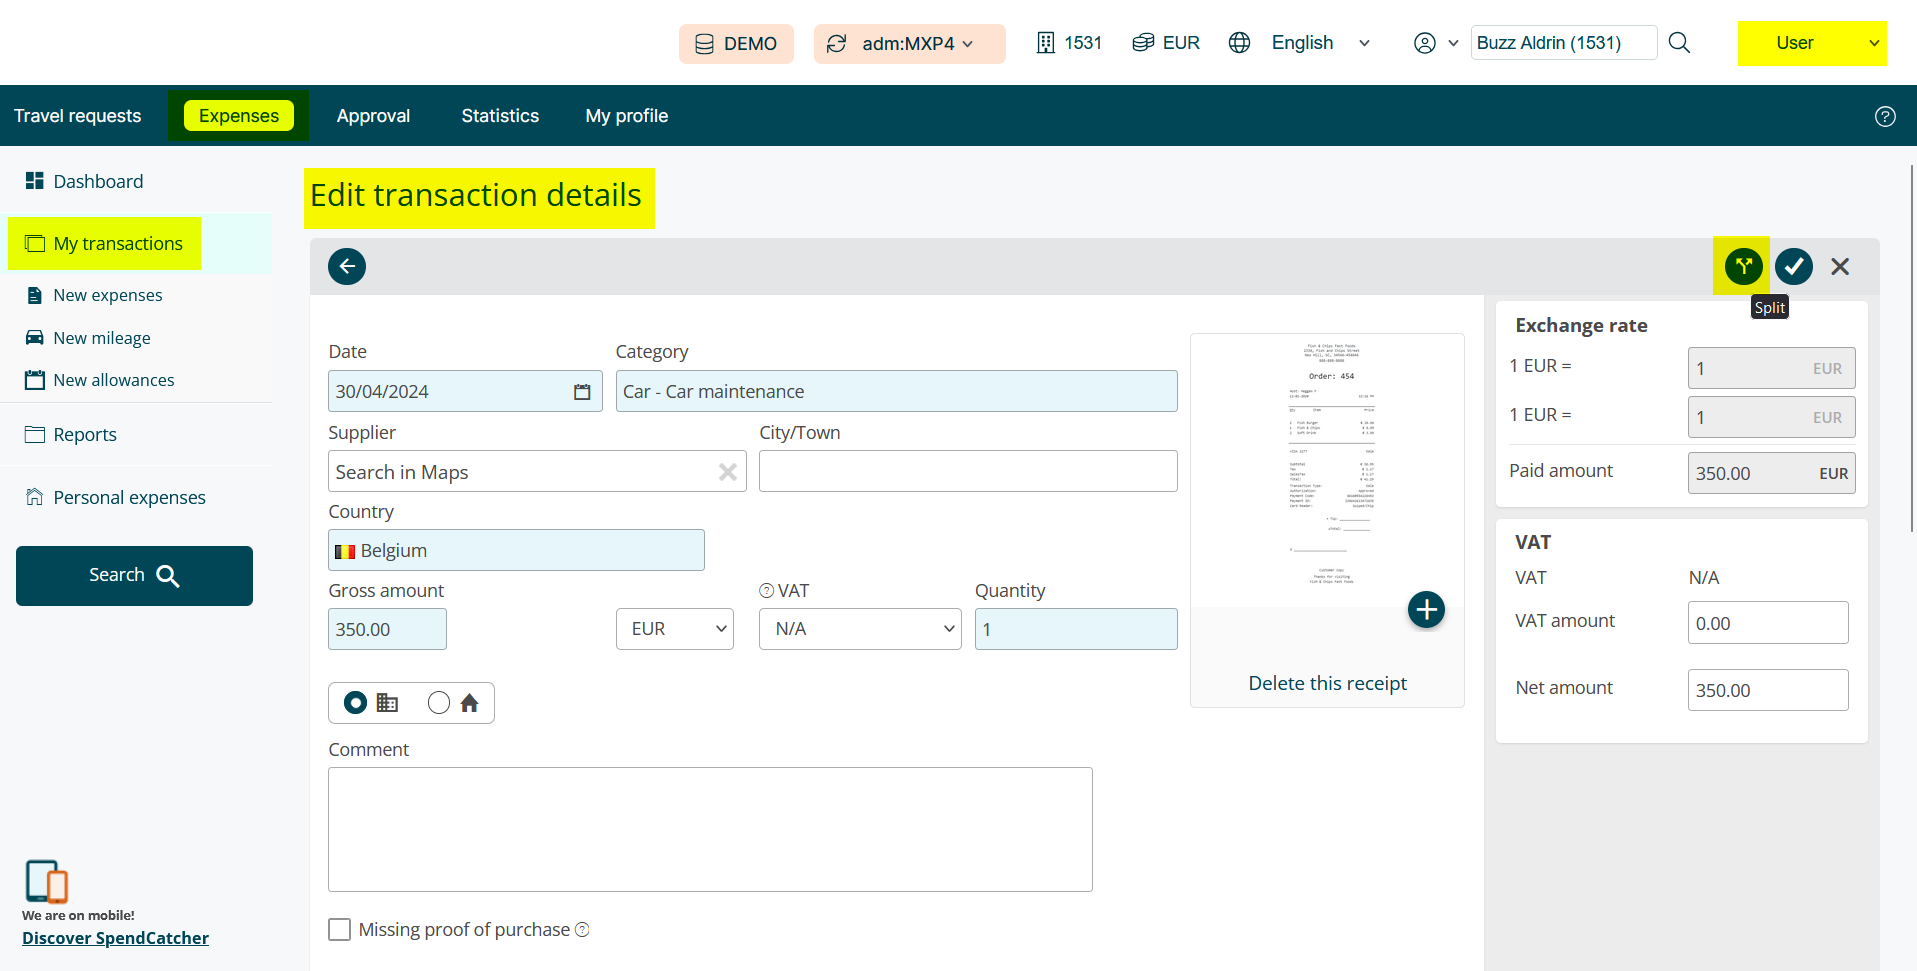
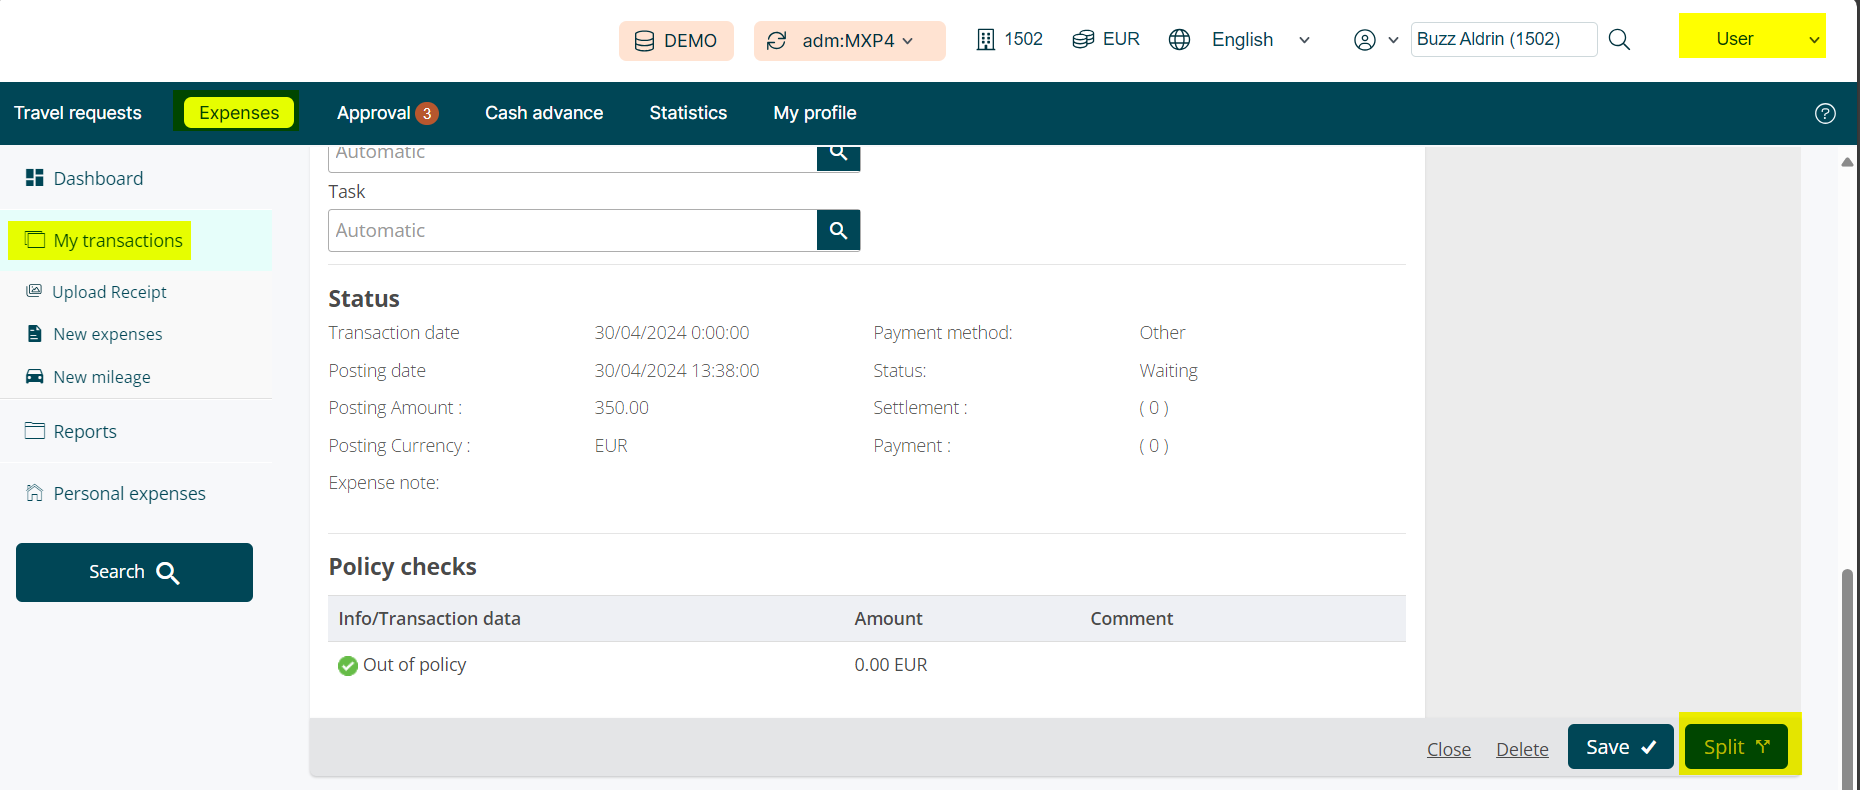
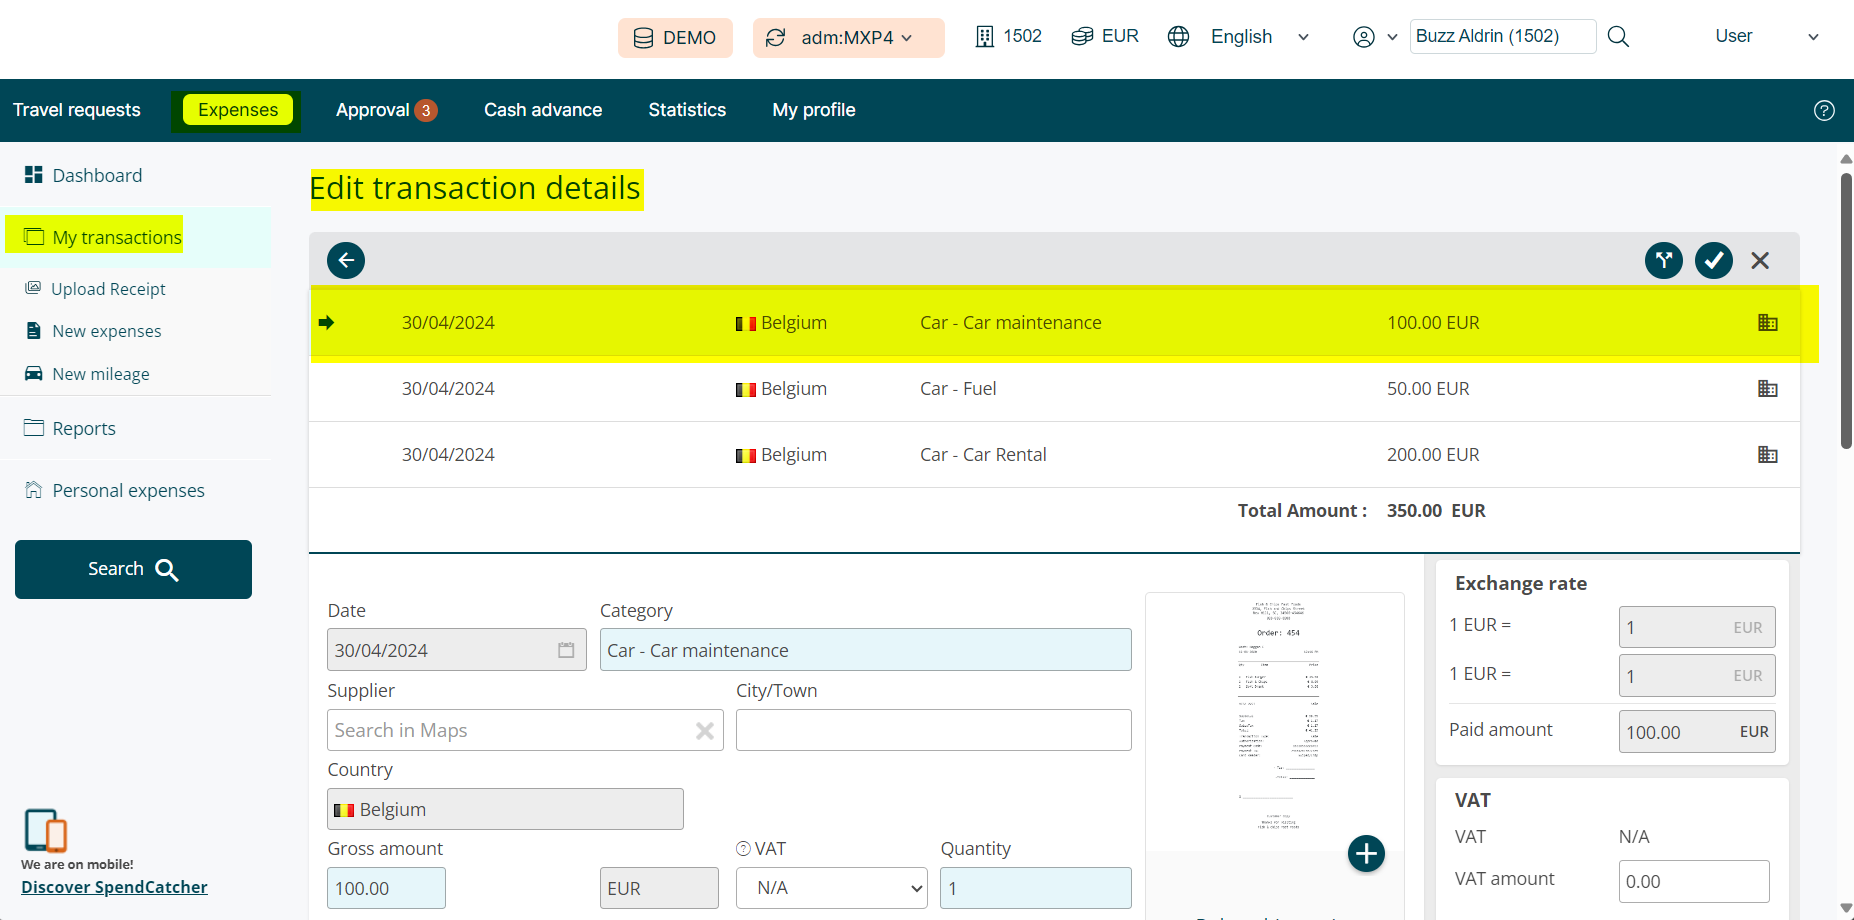
b. The transaction details - You also have access to the “split” option through the “Edit transaction details” page. The split buttons are in the top right menu and in the bottom right footer.
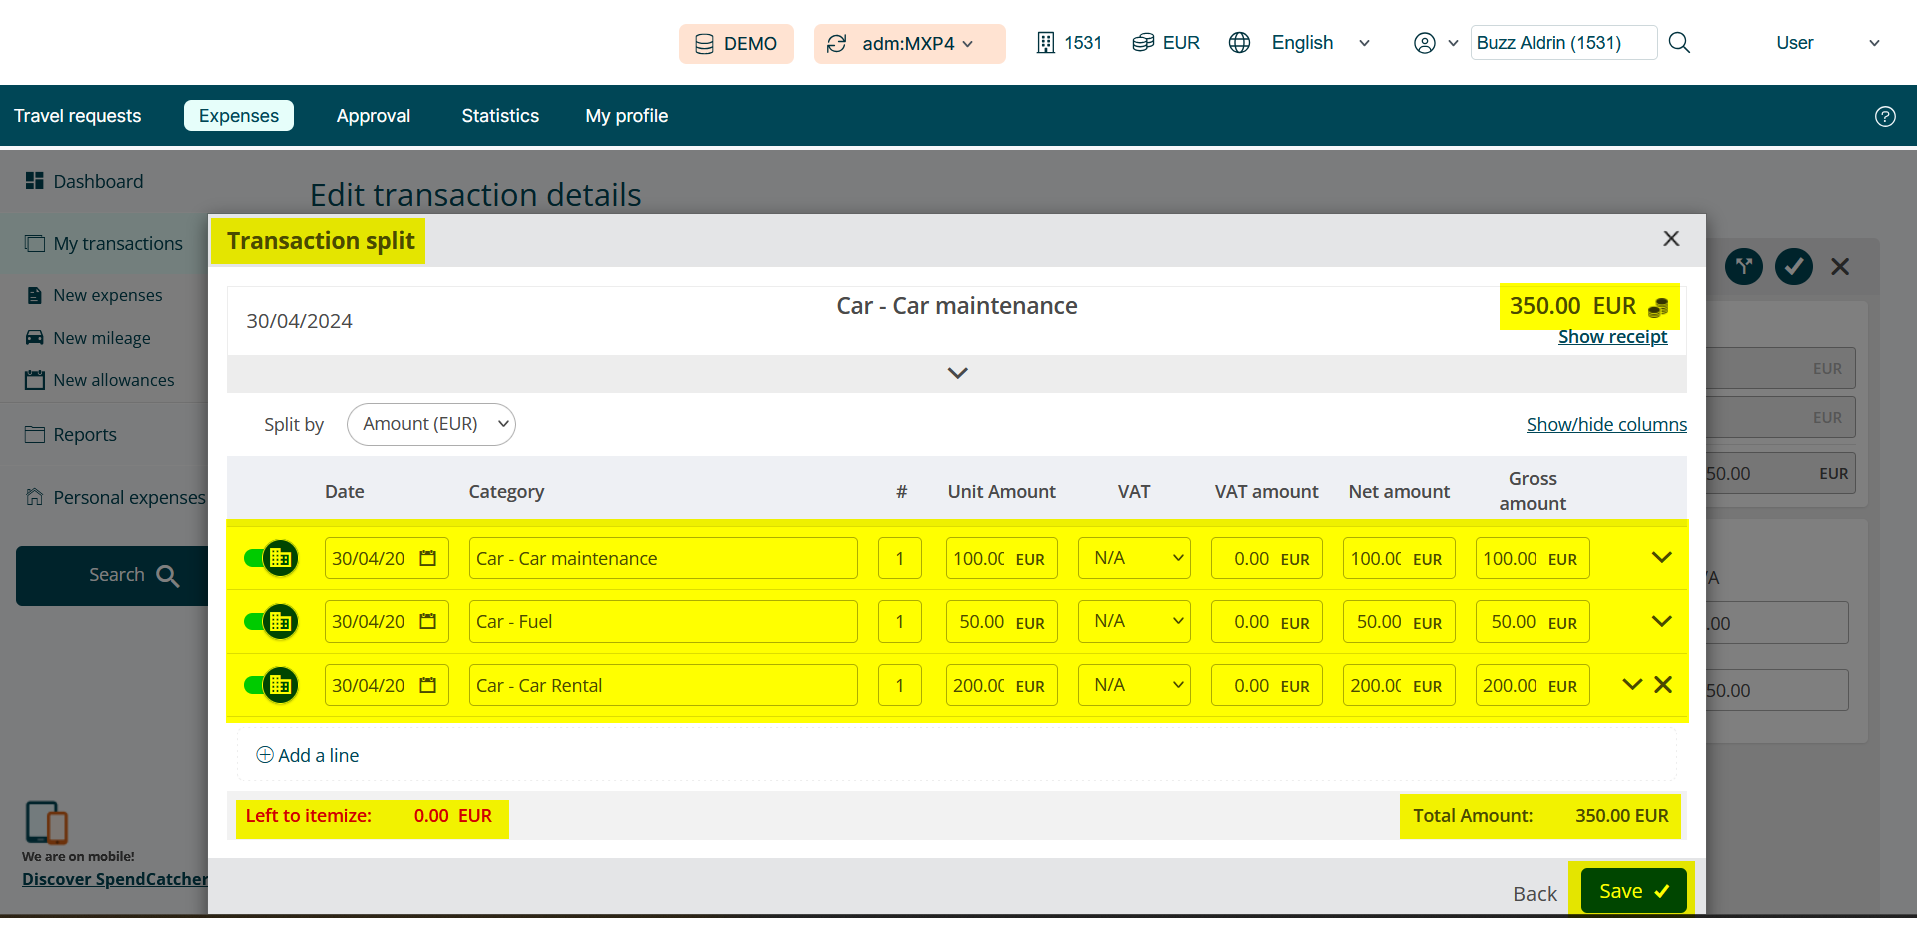
2. The split “popup” is used to divide your transaction into separate items - After clicking “Split,” a pop-up will appear. In this pop-up, divide your transaction into multiple items by specifying each item’s category, amount, and date. The system ensures that the total amount matches the main transaction.
Items can be marked as “private” or “business” and, if enabled, cross-charged to different cost centers or tasks. Once finished, click “Save.”
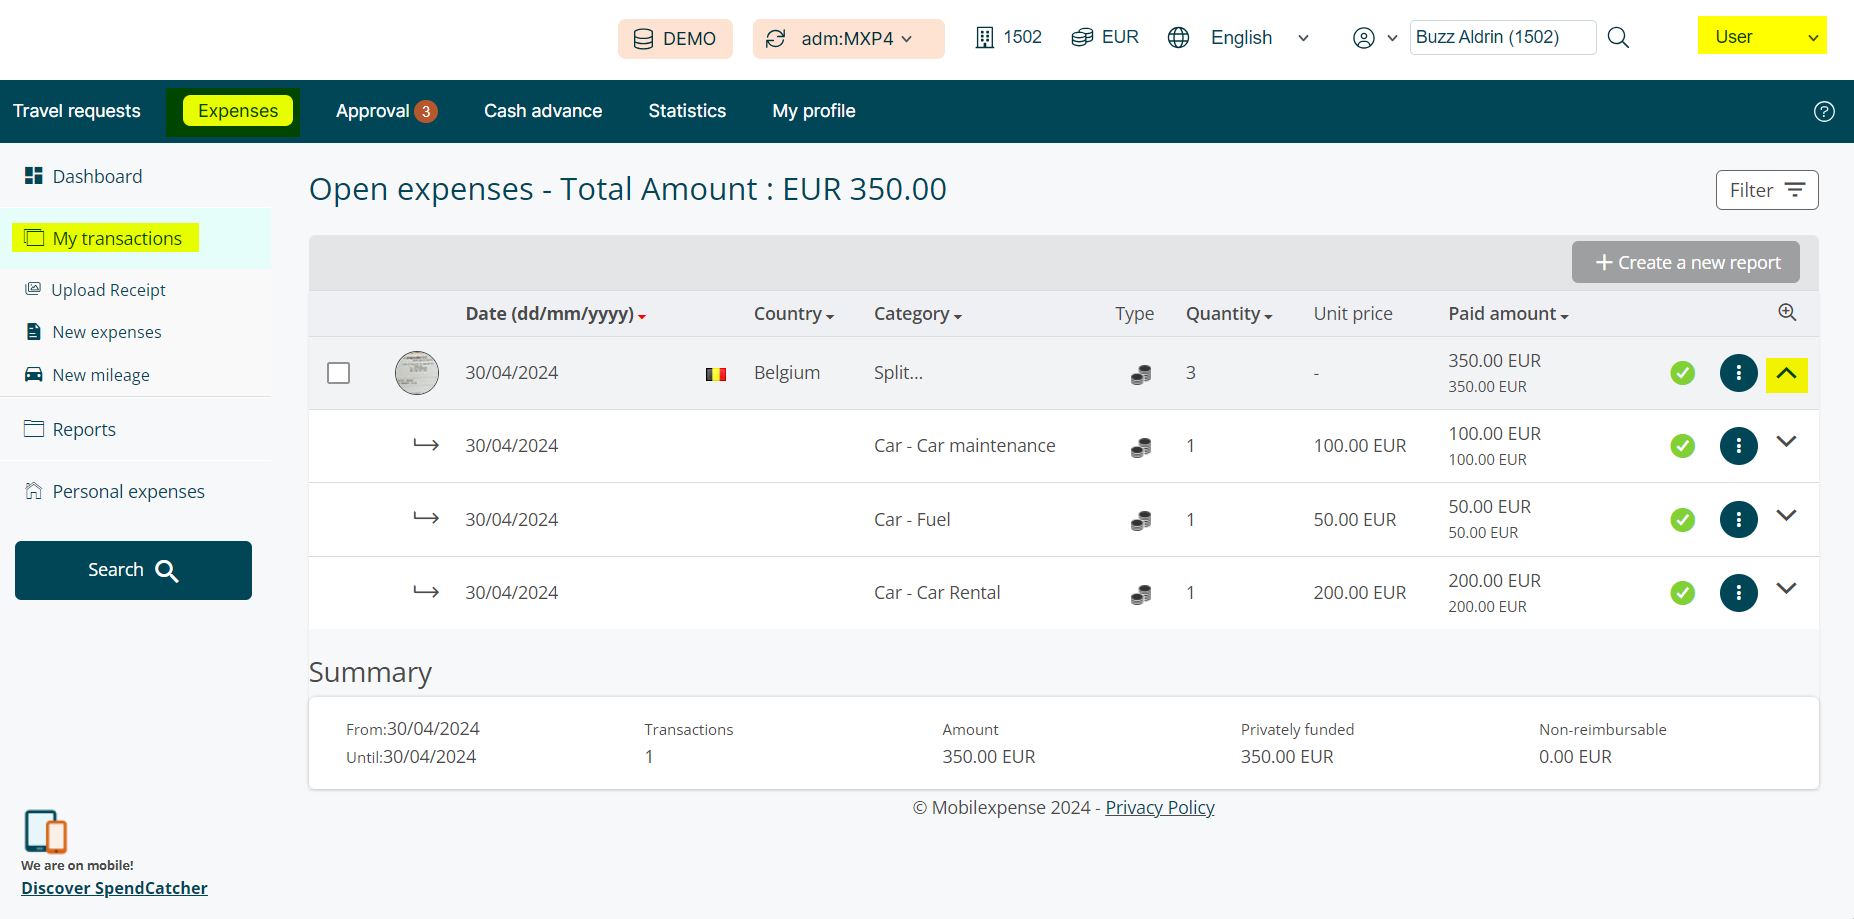
3. View your split items in the transaction list - To view items in a split transaction, click the arrow on the left side of the “Split...” line. This will expand or collapse the split items and show more details about the transaction.
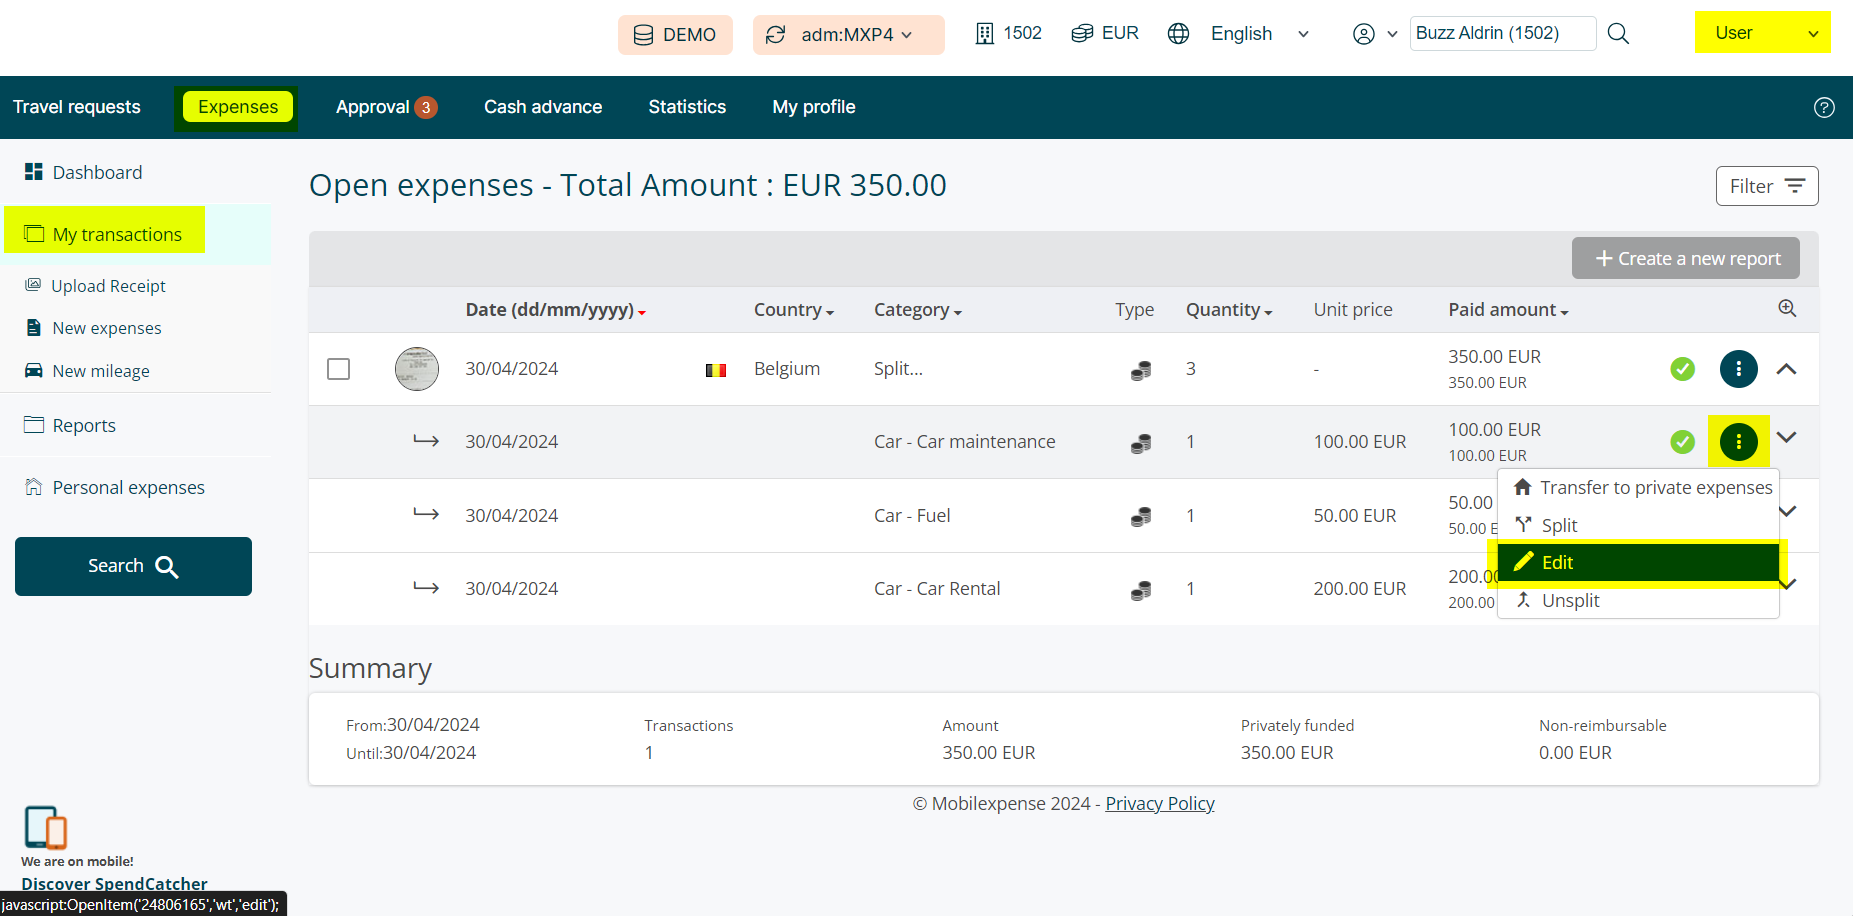
4. Edit your split items - If you wish to edit your split items, simply click on the items lines in the transaction list (or edit button). All the items of your split transaction will be listed on the top of your screen.
The form displays information for the selected item (indicated by the blue line and arrow). Some fields will be read-only, as they come from the main transaction and cannot be altered. When you're satisfied with the changes, click the “Save” button (in the top bar or footer).
5. Unsplit a transaction - You can "unsplit" a transaction at any time to revert it to its original state. If it has been controlled or approved, it may need new approval. To unsplit, click the "Unsplit" button in the footer. Note that this action is irreversible, and you will need to re-itemize the transaction from scratch if you change your mind.

If you would like to discover how to perform several of the tasks related to an expense transaction, including how an expense report can be created, kindly check the articles below: