
An allowance, also known as “per diem” is an amount of money employees are entitled to receive when going on business trips. In this article, we explain how an employee at your organization needs to proceed to claim an allowance with our web application.
-
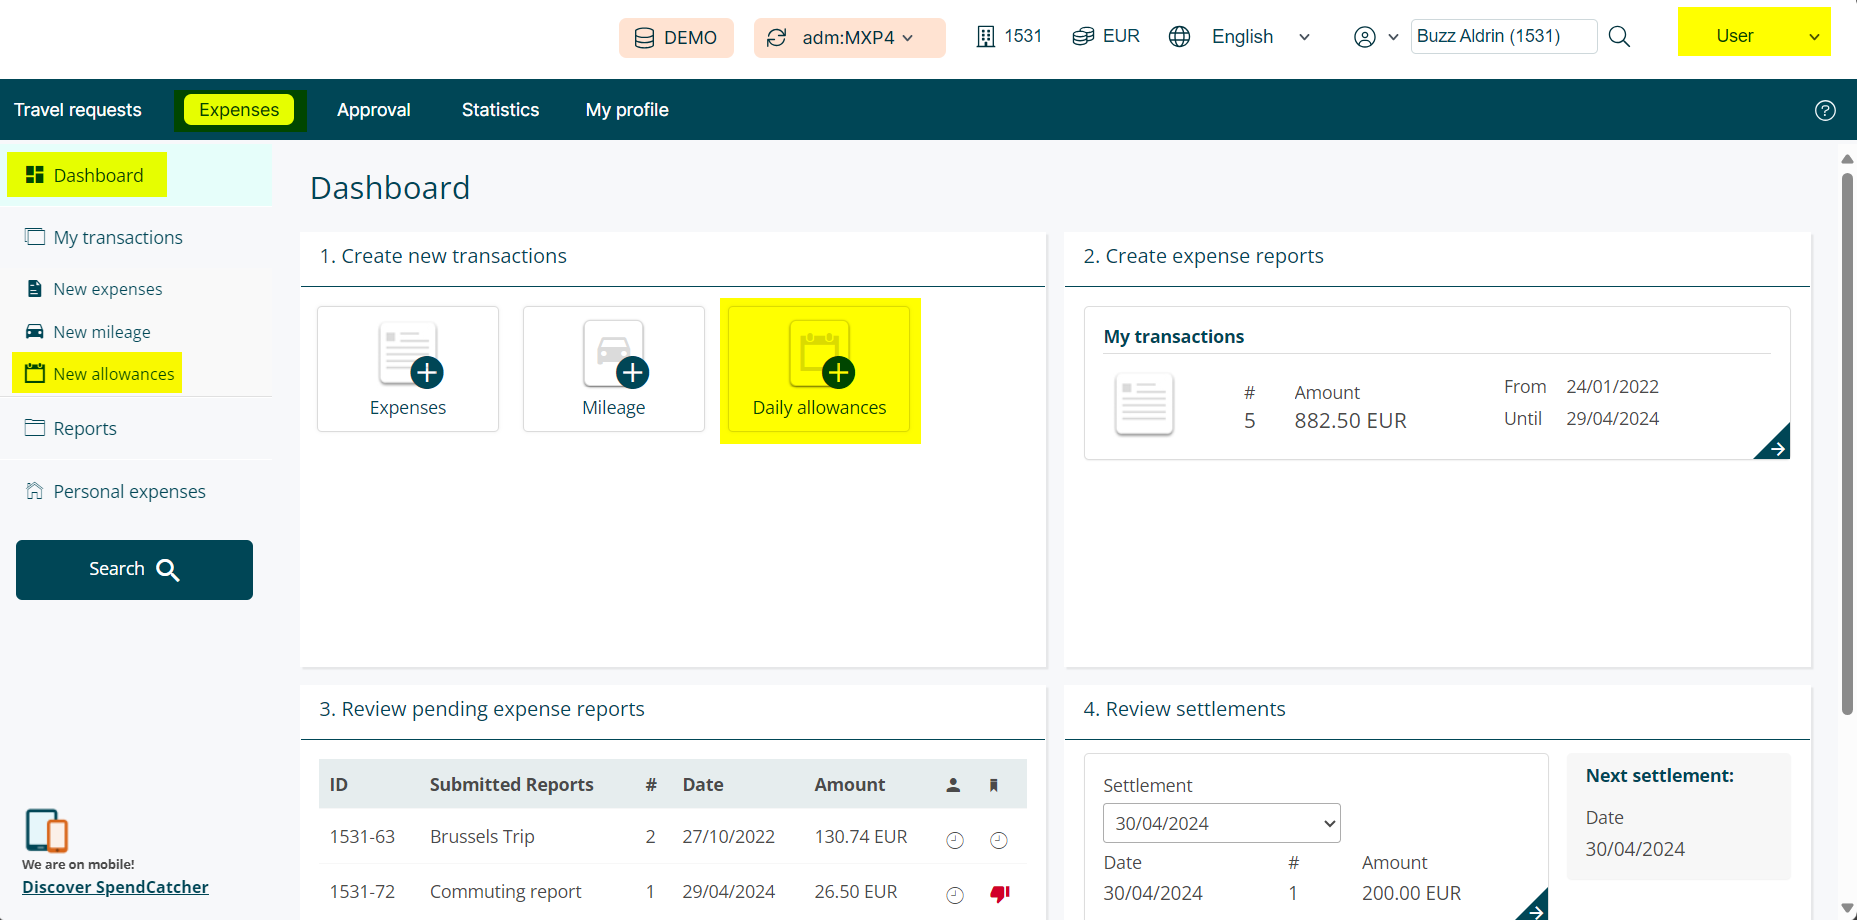
First, select the Expenses tab, and then either click on "New allowances" in the sidebar navigation, or on the "Daily Allowance" button in the dashboard.
The features and design of the allowance module vary by country. To ensure legal compliance, MXP displays different fields and dialogues based on the country of reimbursement. As a result, screens may look different and have varied calculations and options.
-
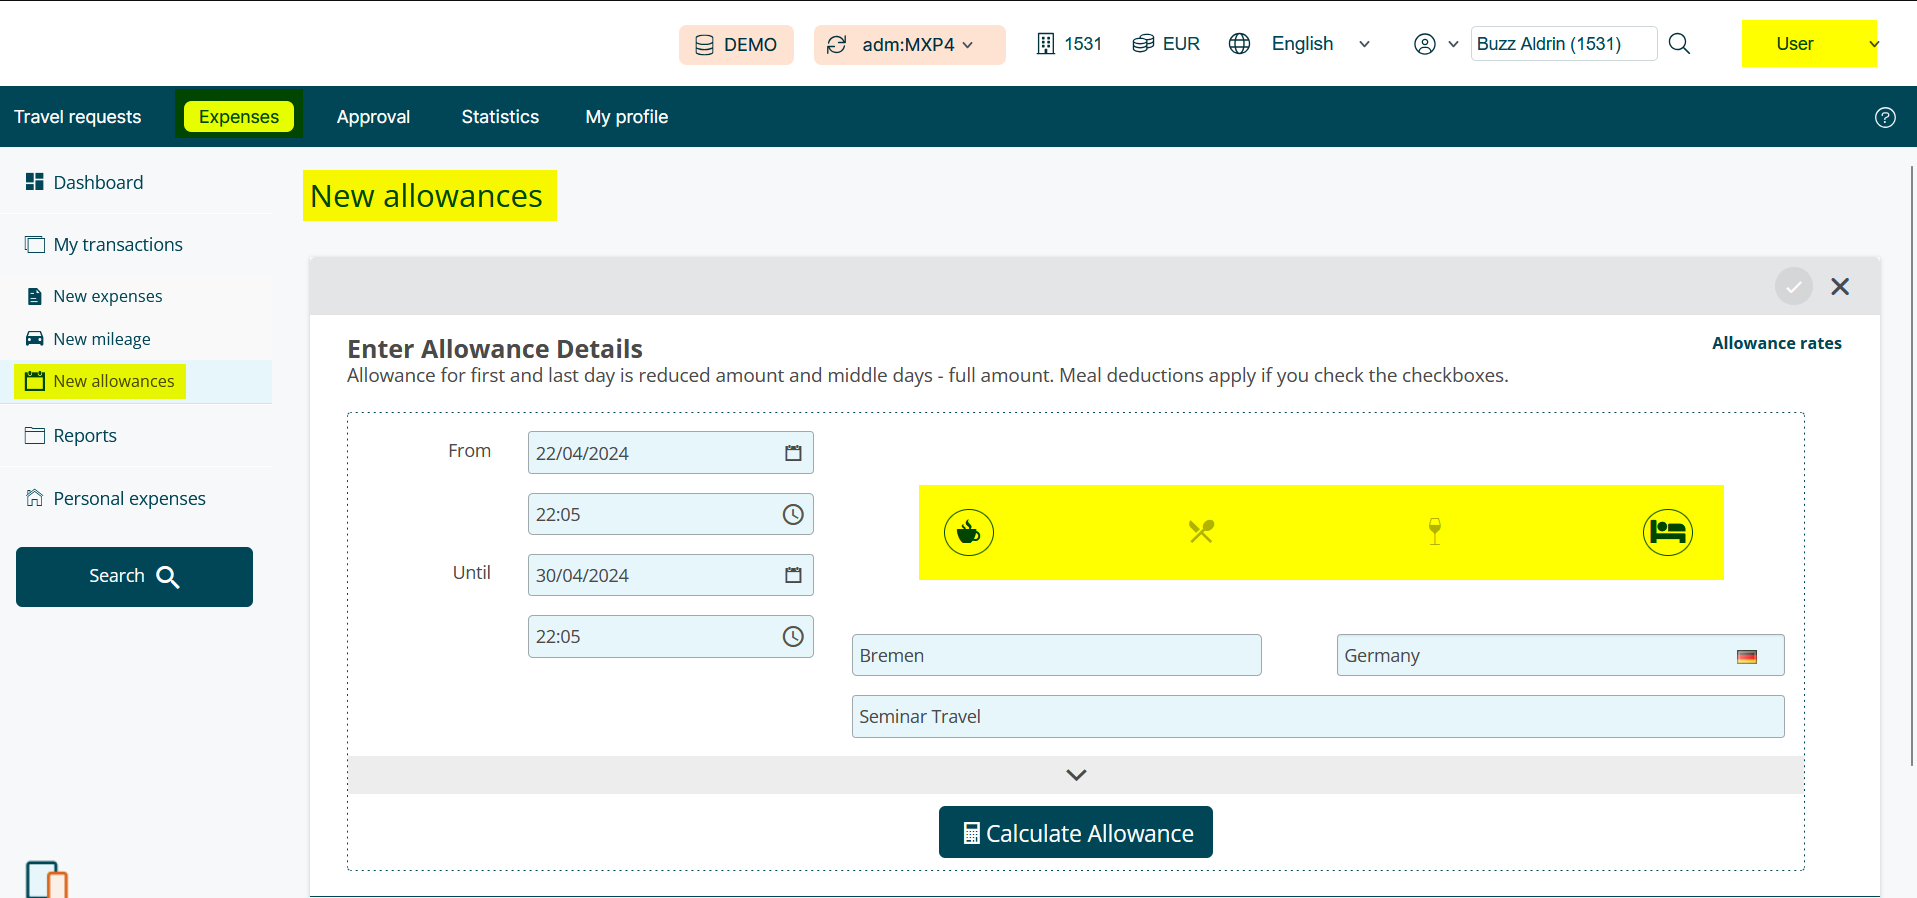
Then start by entering the start and end dates and hours of your trip, as well the destination, in the Search in Maps input field.
-
As a next step, use the icon buttons, as per the screenshot above, to indicate which meals need to be excluded from your allowance, and if lodging needs to be included.
-
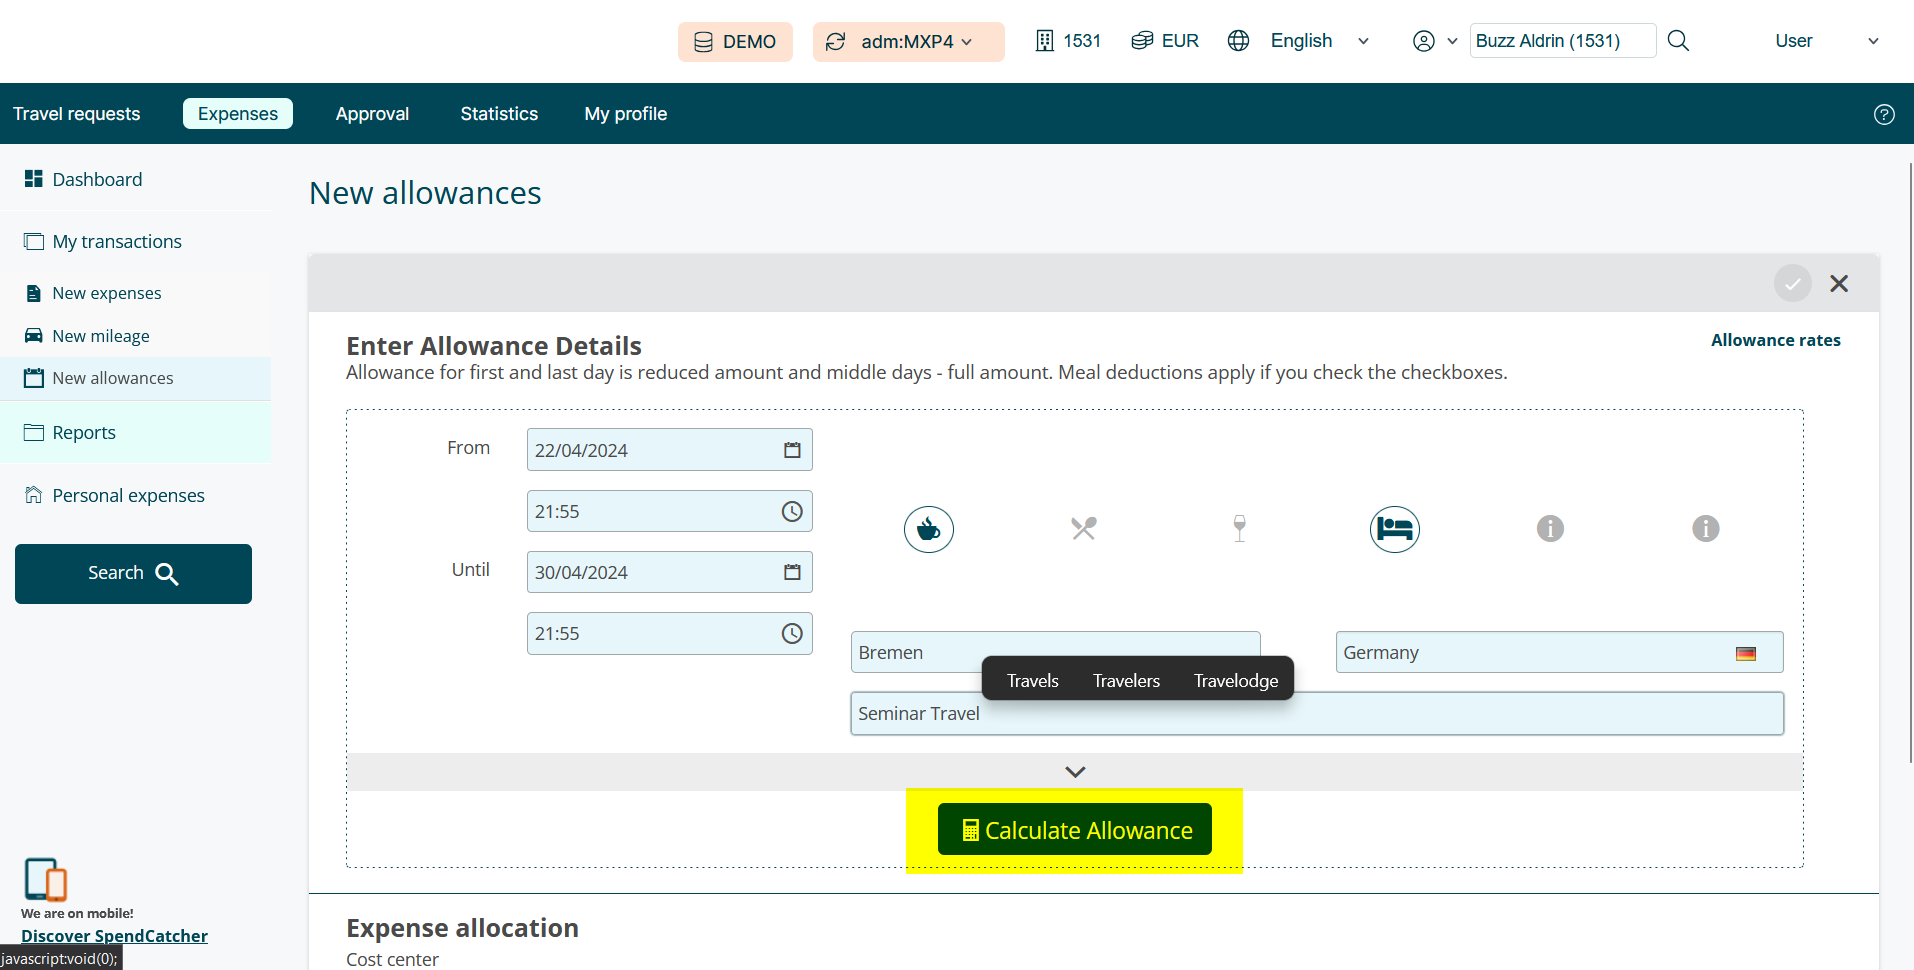
Once all the mandatory fields are completed (the blue ones), the Calculate Allowance button becomes active and you can trigger the calculation of your Allowance.
-
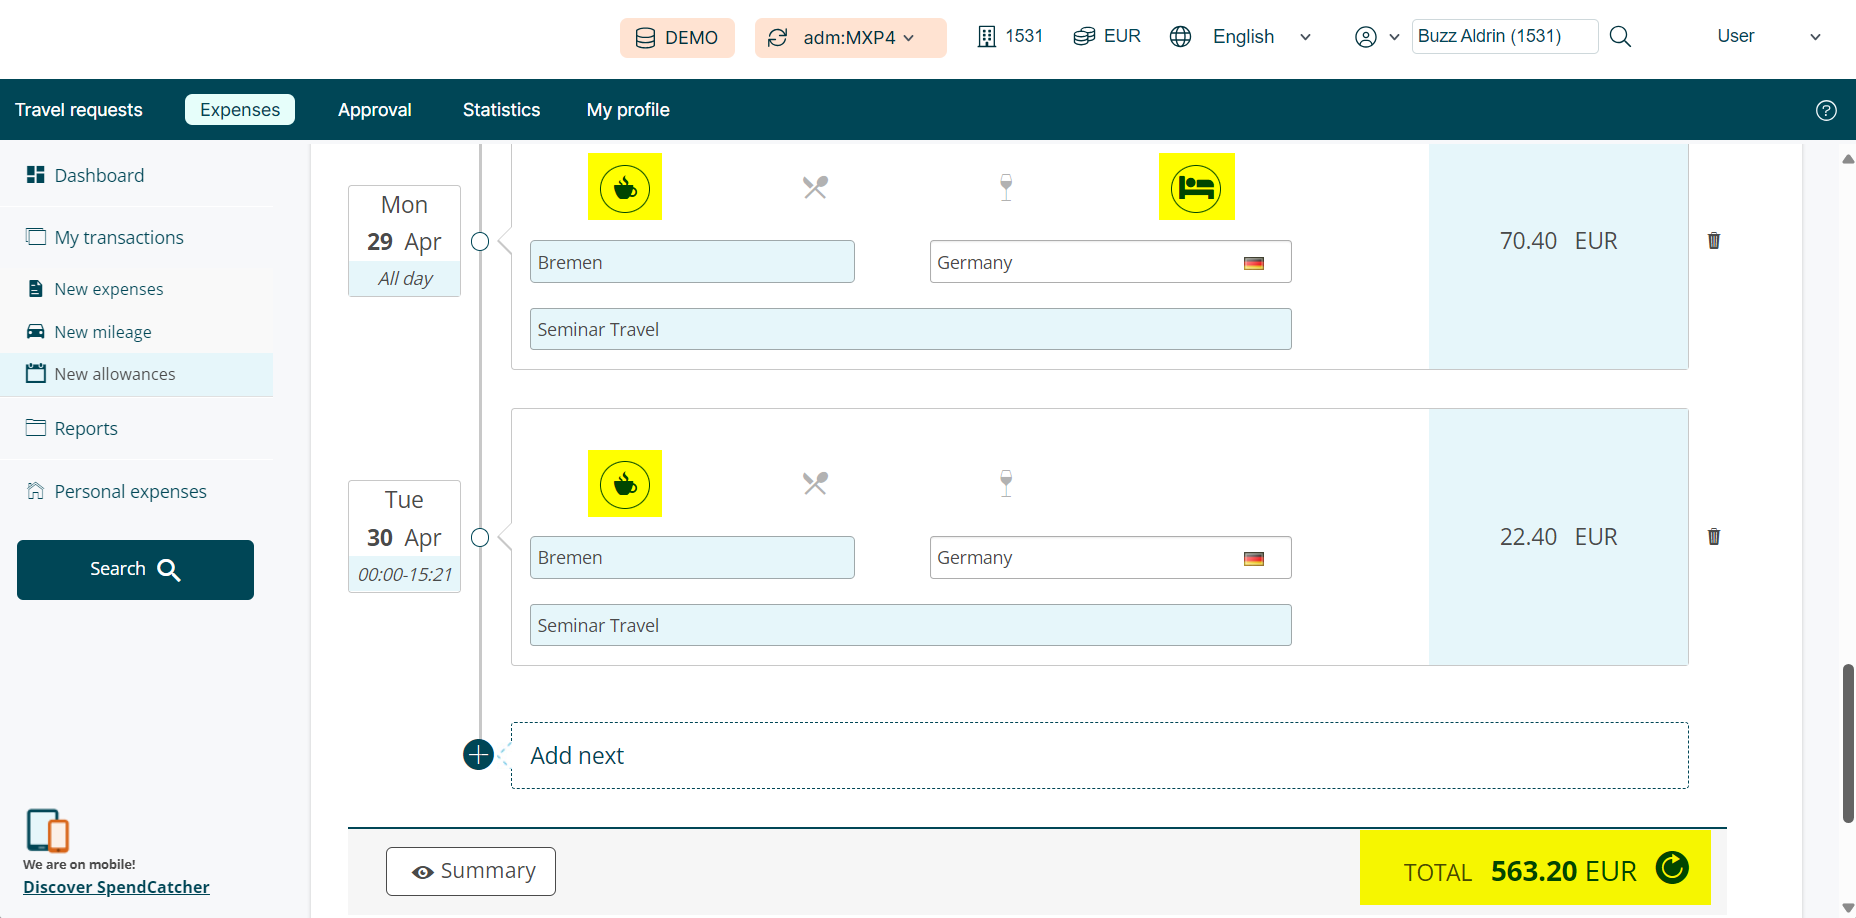
Once calculated, the view will refresh, and you’ll see the details of your allowance claim, split by day. Also, in the example below, the user indicated that breakfast had to be excluded (because it was offered by a third party for example), and that lodging had to be included.
-
If you wish, you can change the details of any given day. If you do change anything, make sure you hit the spinning arrow button at the bottom to update the total amount.
-
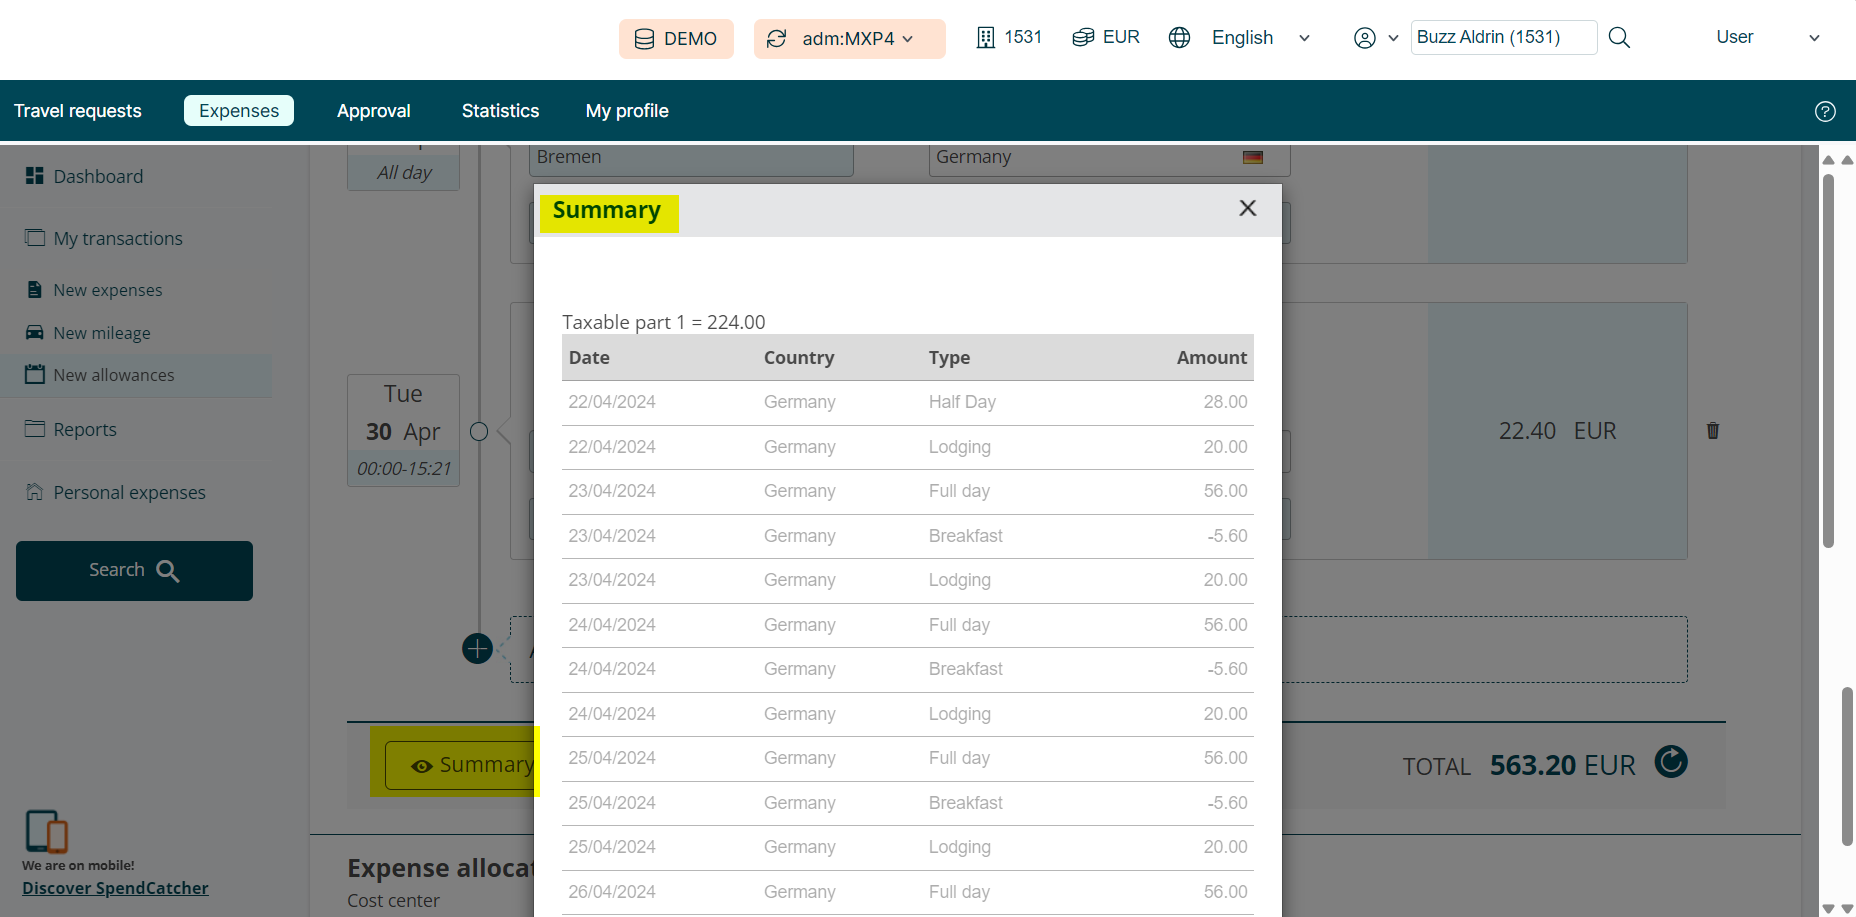
By clicking on the Summary button at the bottom of your trip details, you’ll be shown a popup with all the details of the amounts that have been included.
-
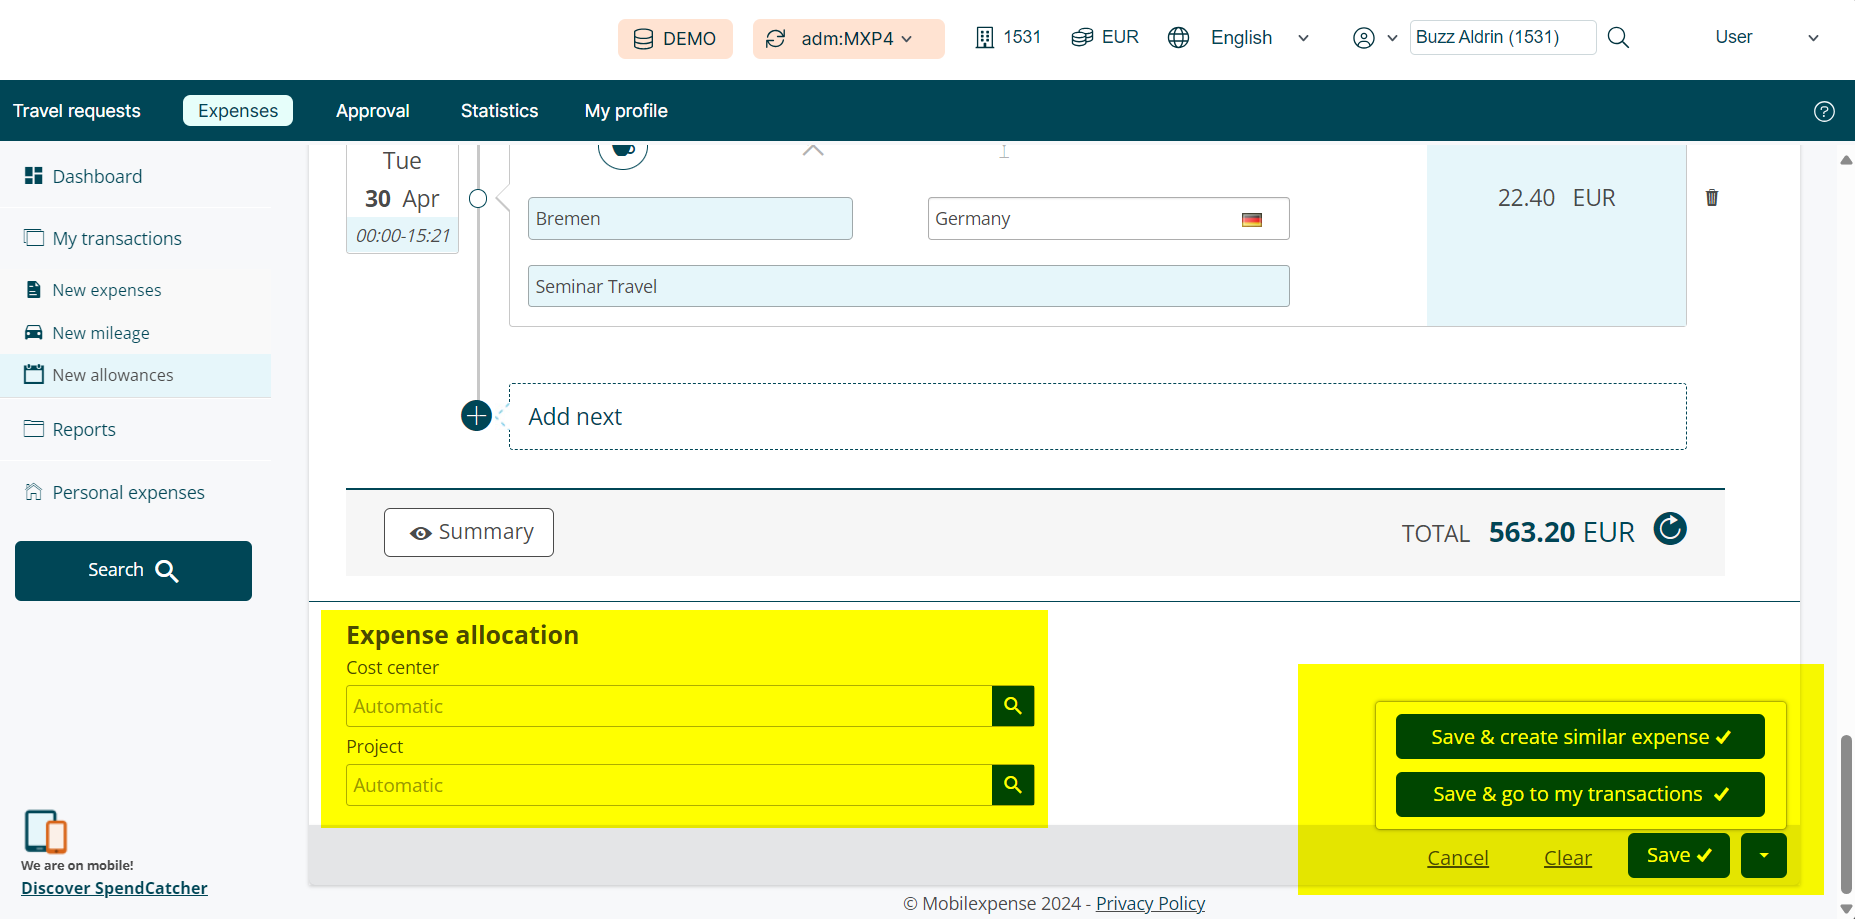
Finally, allocate the costs of your claim to a specific cost center and project, then click the Save button to record your allowance claim.
-
Note that saving the expense does not automatically submit it. After saving, you must add it to an expense report and submit the report for approval.
-
Save the expense & go to my transactions, hence be redirected to the main page of the section 2 of the Dashboard, where all the open and draft transactions can be found.
-
Lastly, save the expense and create a similar one directly by clicking the arrow next to the Save button and selecting this option. This feature is especially handy for repeating expenses on different dates, making your life a lot easier!
-
To learn how to handle allowance tasks, including creating an expense report, check the articles below. For more on compliant and legal allowance rates in your country, visit the Compliance Centre: